Before you begin the translation, you will need the following:
- Poedit software
- The .pot file of your theme or plugin - You can get this from the zip file of the theme or plugin that was downloaded from the Purchase History of your account, it's usually in the languages
Once you have both, follow the instructions below.
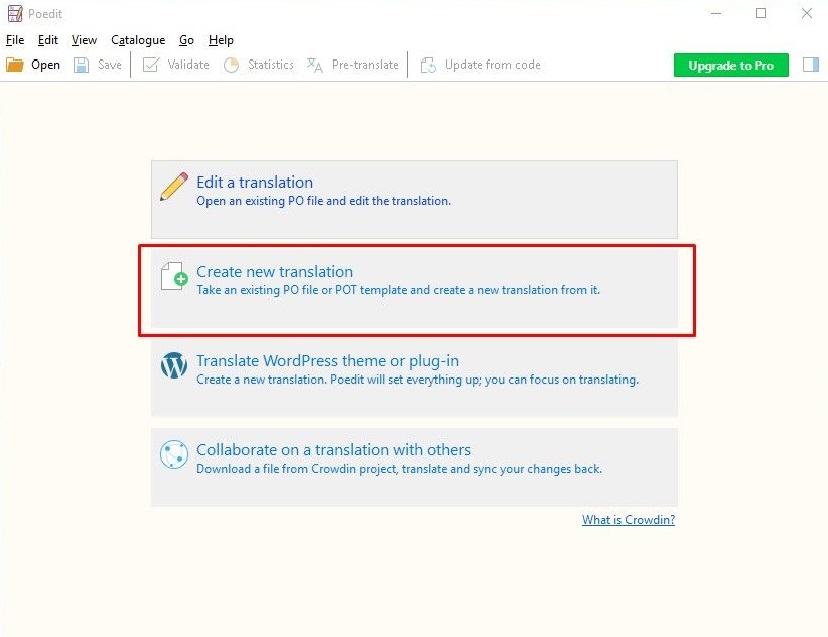
1. Open the Poedit software > Create new translation
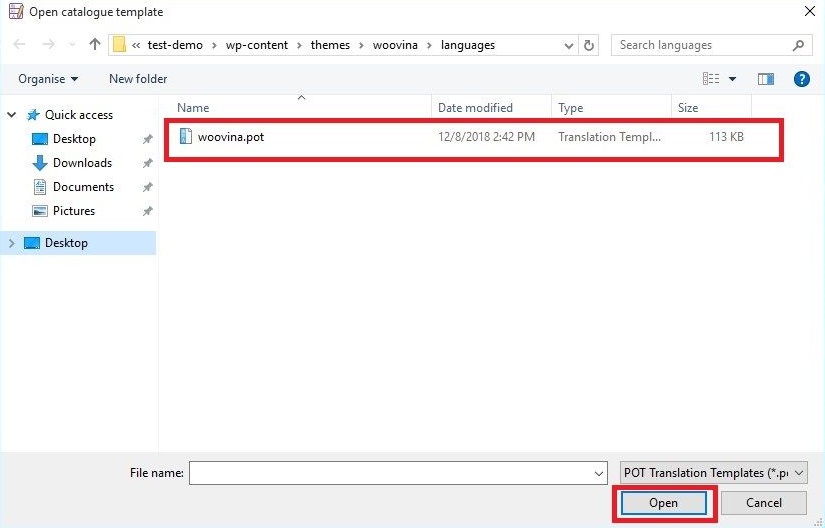
2. Locate the file .pot of the theme/plugin you wish to translate
3. Choose the language you would want it to be translated into
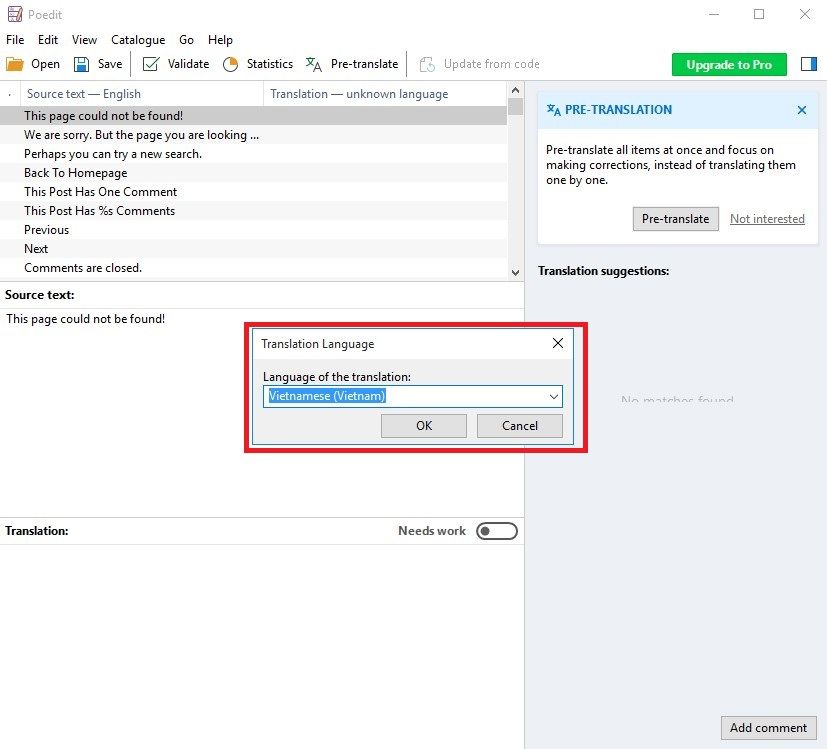
Note: WordPress uses a language code for every language there is. This needs to be followed otherwise the translation won't work. For the list of language codes WordPress uses, please click this Link.
4. Once you have your language selected, you can now begin the translation
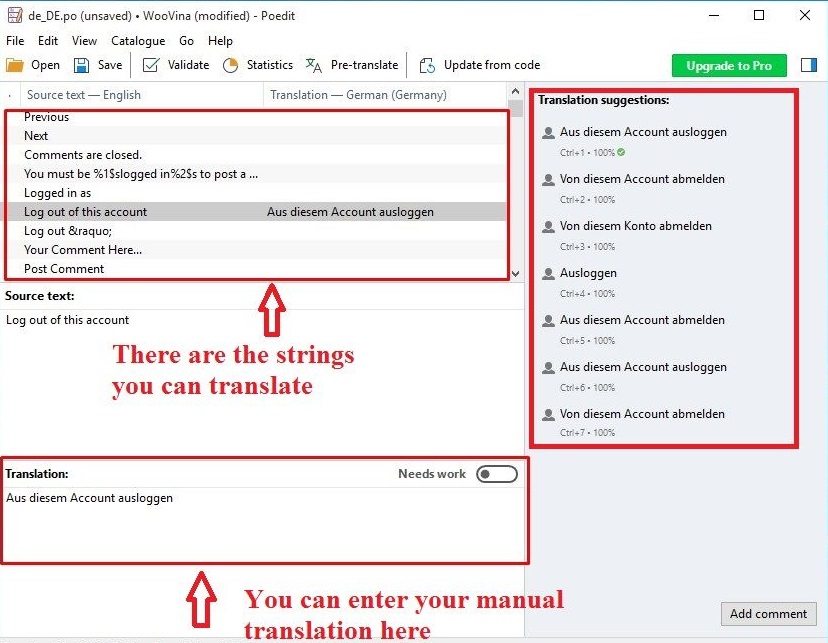
Once done, click File > Save As.
5. Make sure that you saved the file in the correct format
The format should be theme-text-domain-language_code. Example: woovina-en_US for US English, woovina-vi for translating WooVina theme to Vietnamese.
The text domain of any theme (if it's translatable) can be found in the style.css file of that theme:
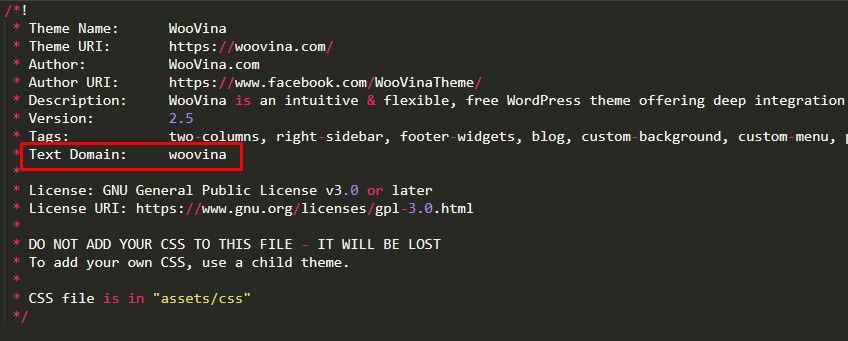
The text domain of any plugin(if it's translatable) can be found in the main plugin file (usually named the same as the plugin itself):
Once you click save Poedit will automatically generate .po and .mo for you.
Upload these two files in this location by accessing your site via FTP or your hosting's file manager program, once connected go to wp-content/languages/themes (when dealing with themes) or wp-content/languages/plugins (when dealing with plugin translation).
If you do not have this languages folder in your wp-content folder then simply create it.
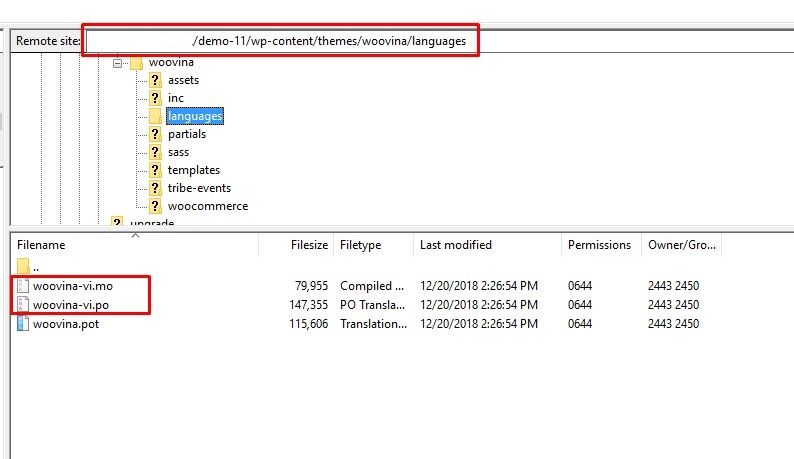
6. Change the local language in WordPress.
Once you have added the .po and .mo to the said location, go to your WordPress Dashboard > Settings > General.
Under Site language, change it to the same language as your Poedit translation.
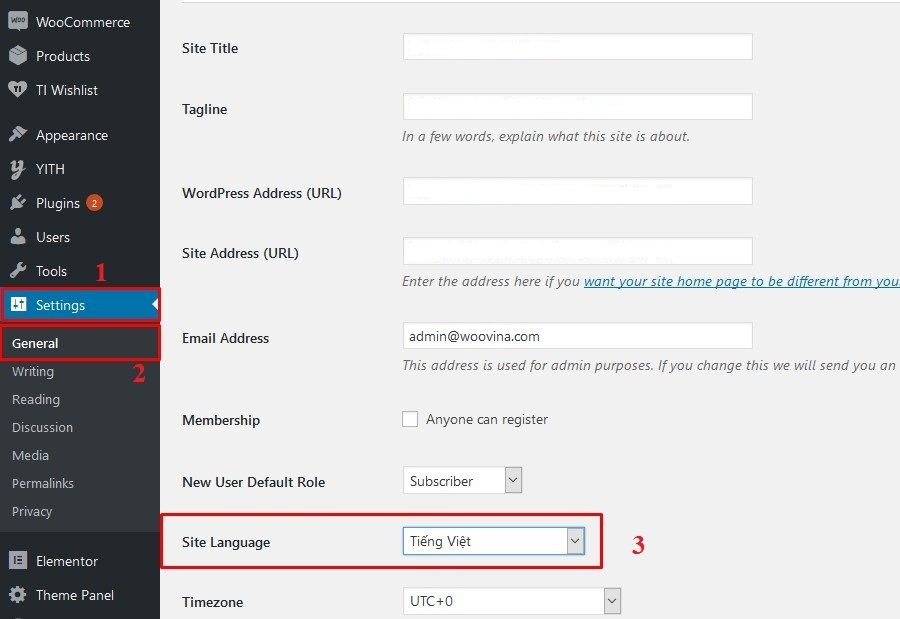
Check and test your site if it's working.

