Attributes function similarly to Categories in WordPress. However, in this case Attributes are applied to Products as Cateogories are assigned to Posts or Pages in WordPress. Attributes are a key feature of most WooCommerce stores, but they are easily misunderstood. They're also often confused with WooCommerce variations.

Using Predefined Attributes or Custom Attributes, How to Decide?
WooCommerce allows you to set global attributes that can be applied later to any new or existing products. For example, a common predefined attribute for a clothing store would be sizes. Instead of setting a size attribute for each new product, you can have Size predefined as a repeating attribute.
Conversely, custom attributes can be created as needed. For example, if you are selling “Smasho” available in three varieties of “Heat”: regular, hot, and boiling then a custom, non-repeating attribute will meet your needs. Of course, setting a custom “Heat” attribute assumes that “Smasho” is the only product available with a “Heat” attribute.
If you eventually have many products requiring the same custom attribute then you may want to consider predefining the repeating attribute.
How to Add Predefined Attributes to Your Store
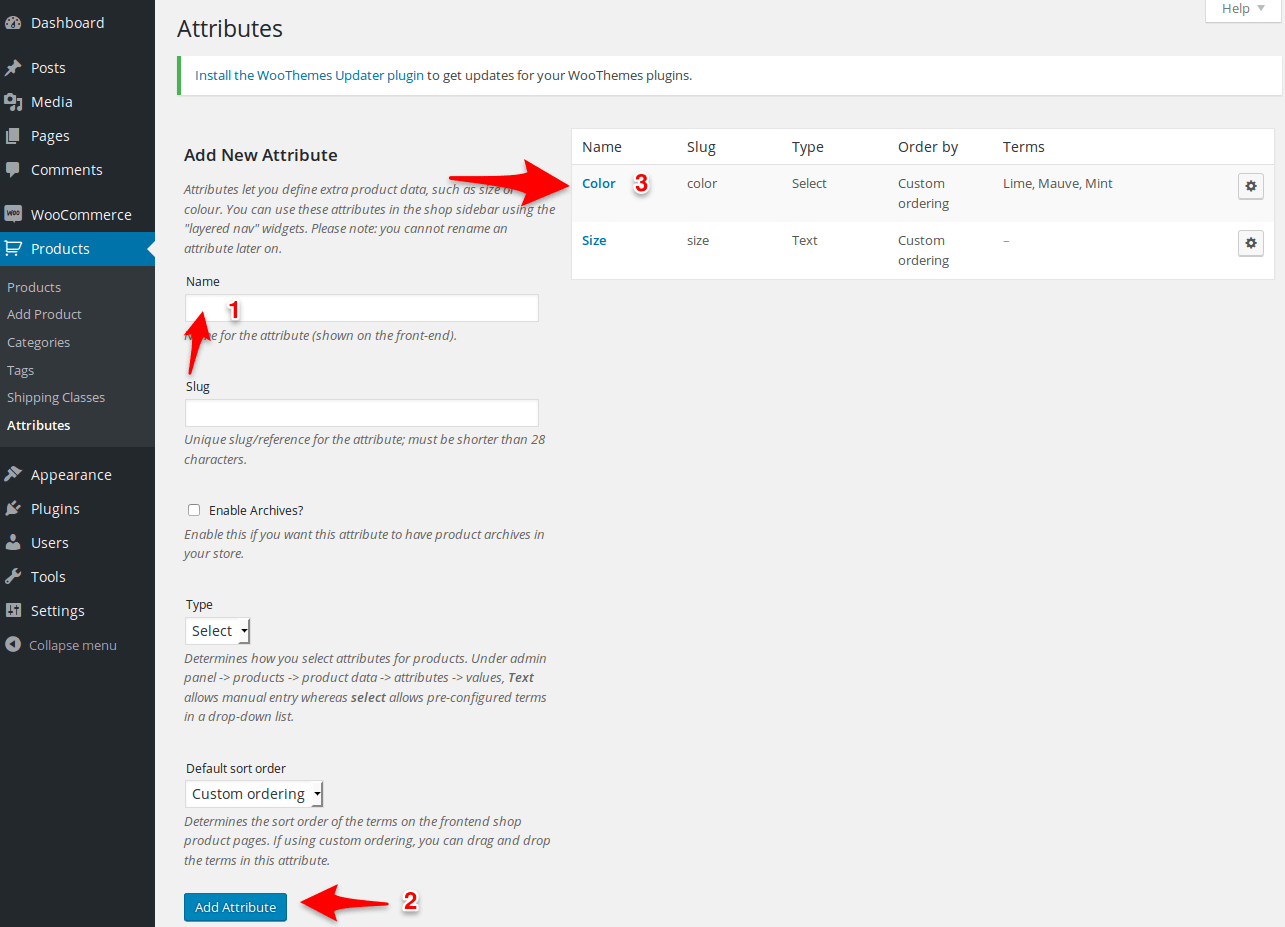
In your WordPress admin panel find the Products tab and choose Attributes below.
You will see the Add New Attribute interface.
- Step 1: Under Name fill in the name of the attribute
- Step 2: For Type you can choose Select or Text. Select will allow pre-configured values to display automatically in a dropdown menu. Text will allow you to manually enter values later.

- Step 3: Click Add Attribute
If you chose Select for Type you may now select your attribute to configure the attribute values. You will notice the attribute you created in the table at the top right of the Add New Attribute window.
Configuring the Terms for WooCommerce Attributes
Now that we have created our attribute, we can create some different Color & Size.

Click "Configure terms" in the same row as "Color".
To add the attribute values:
- Choose your new attribute at the top right
- Under Add New ___ name the value
- Click Add New ___ at the bottom

How to Add Custom Attributes to Individual Products
As discussed above, you may find it preferable to assign a custom attribute to a unique product as needed rather than going through the above-described procedure of setting pre-configured attributes.
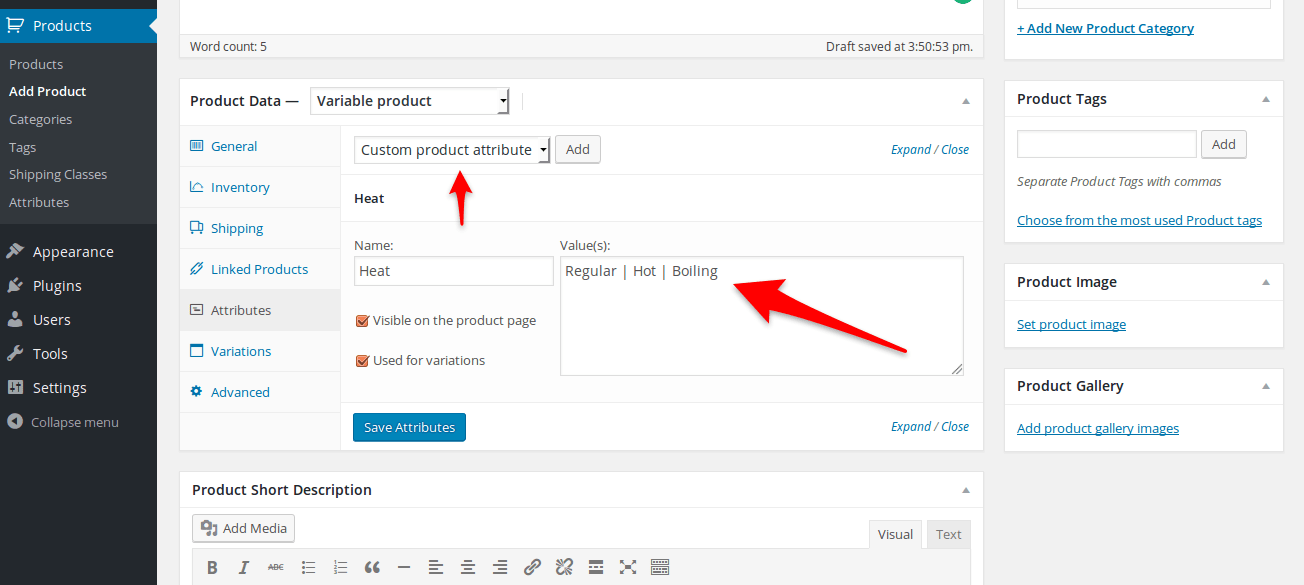
For example, your store may sell a variety of different items that do not share common attributes. For those types of products you can set custom attributes in the Product Data menu.
- Step 1: Go to your WordPress admin panel
- Step 2: Select a product or Add New Product
- Step 3: Scroll down to the Product Data section
- Step 4: Click Attributes
- Step 5: The dropdown menu for “Custom product attribute” is already selected
- Step 6: Click Add
- Step 7: Name your Attribute and add your values. Make sure to separate each value with a pipe (|). For example: Small | Medium | Large

- Step 8: Click Save Attributes
That’s all, we hope this article helped you learn how to Create Product Attributes in WooCommerce.

