Note: It is recommended uploading sample data on a fresh WordPress install to prevent conflicts with your current content. You can use this plugin to reset your site if needed: Wordpress Database Reset.
I. Install WooVina theme & required plugins
You are going to install and import demos of a child theme of the WooVina theme. So you must install WooVina theme and all required plugins on your WordPress website before start to install and import demos of a child theme. You can follow this article to know how to install WooVina theme.
II. Download and Install a Child Theme
- Select a child theme and get started:
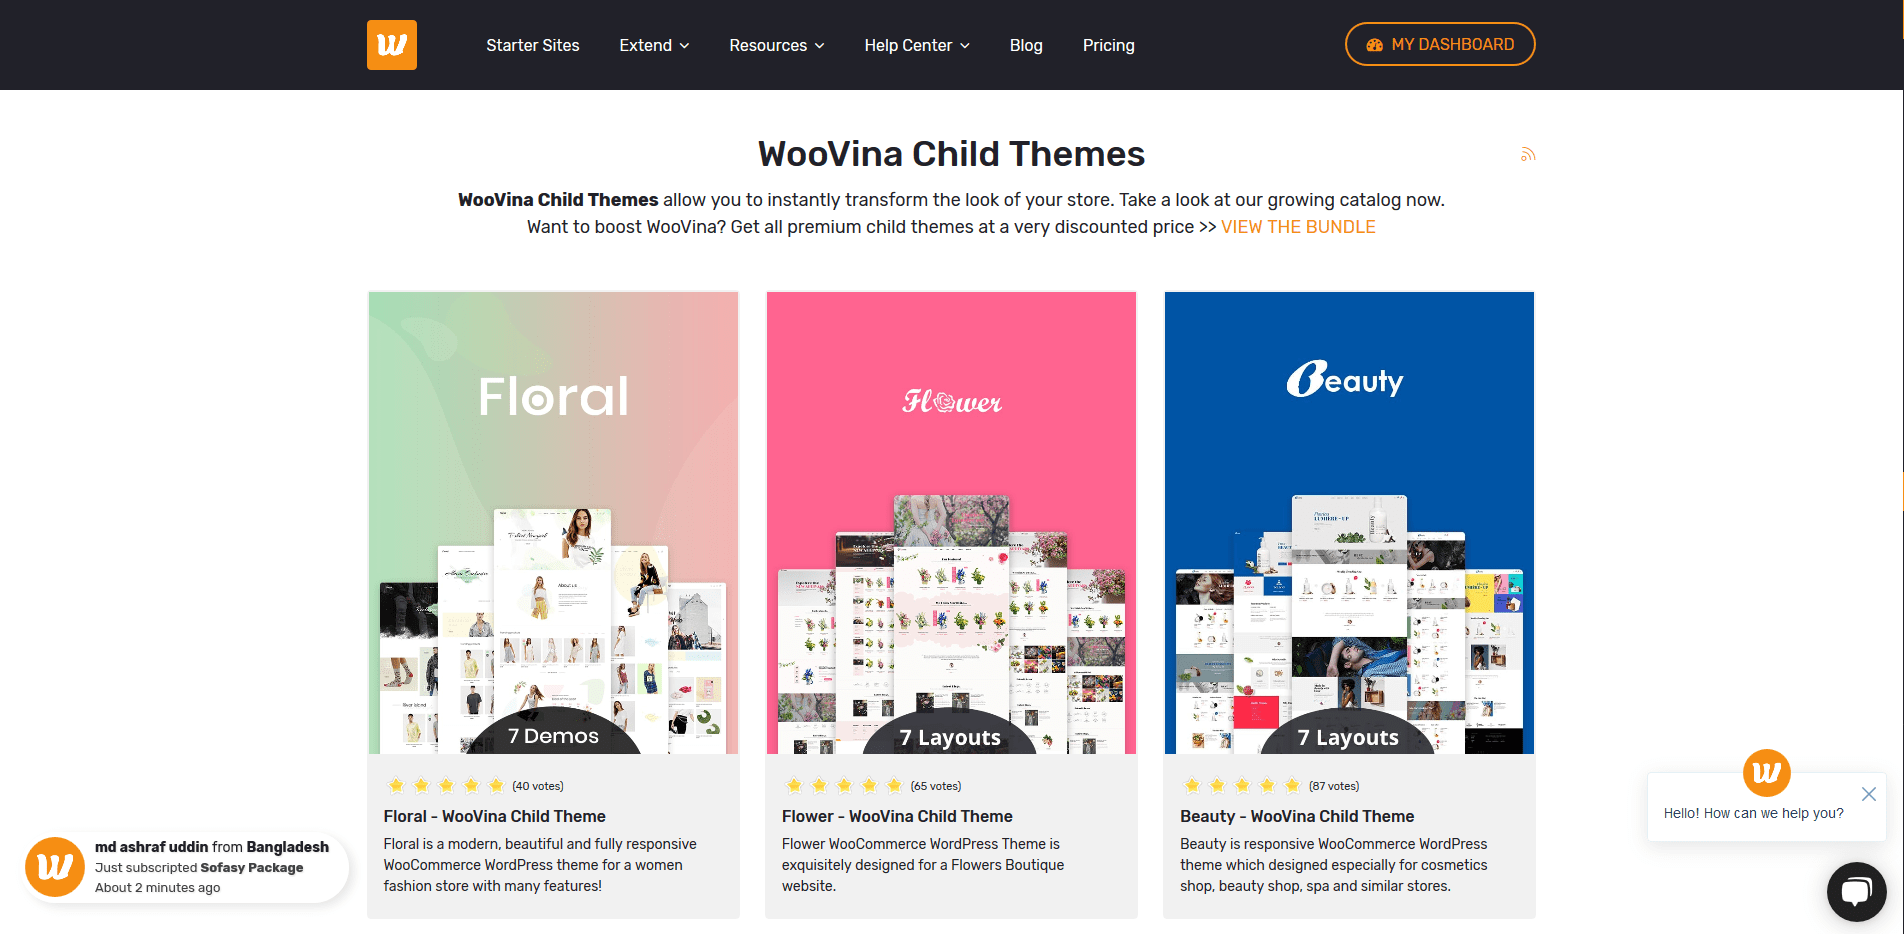
Visit WooVina.com and go to menu: Extend > CHILD THEMES to select a child theme you want to use to create your e-commerce website.
- Download child theme install package:
After registering a child theme's package, you need to login to WooVina.com and go to the My Dashboard > Downloads and download child theme install package:

- Install and activate child theme:
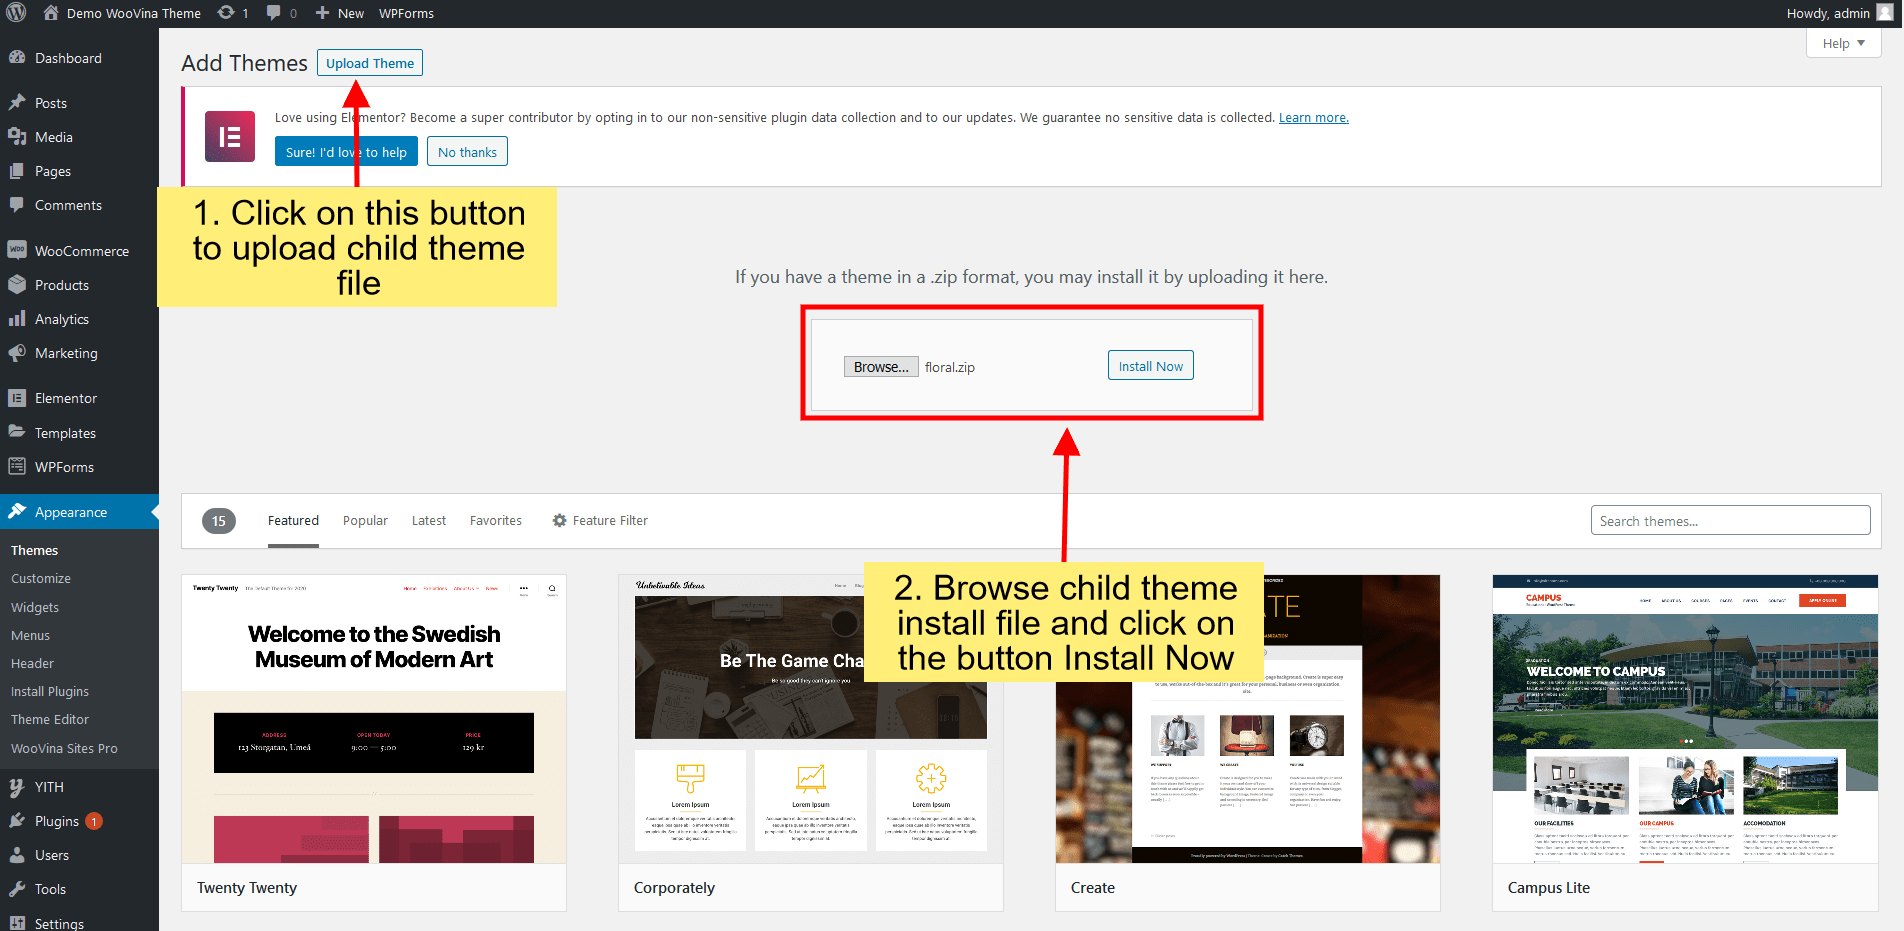
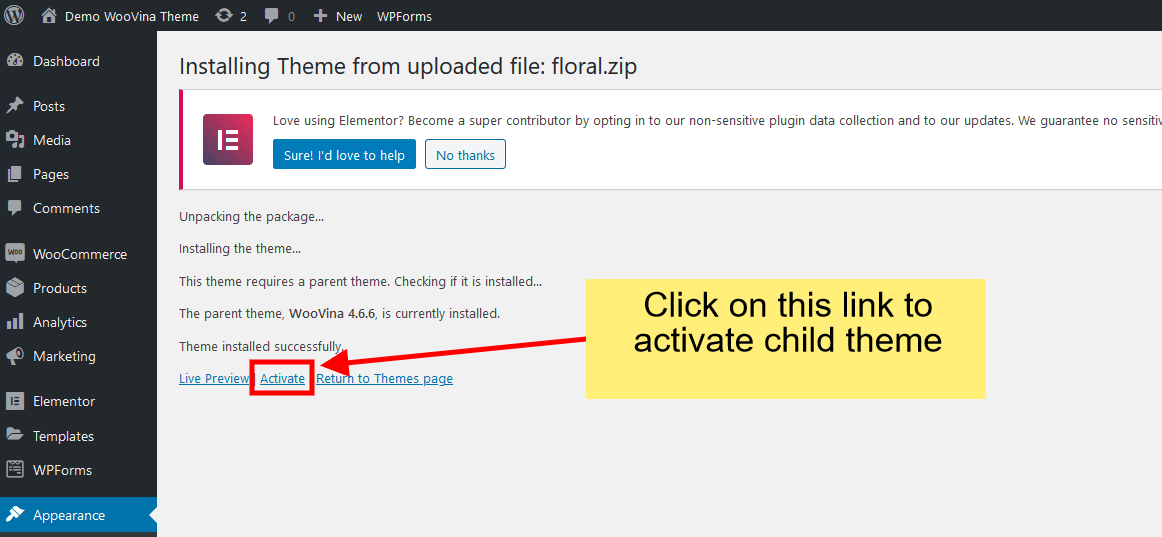
Login to your website, and go to the Appearance > Themes > Add Themes > Upload Theme > Browse... child theme install file you've downloaded > Click on the button Install Now
III. Activate license to unlock Pro Demo & Premium Plugins
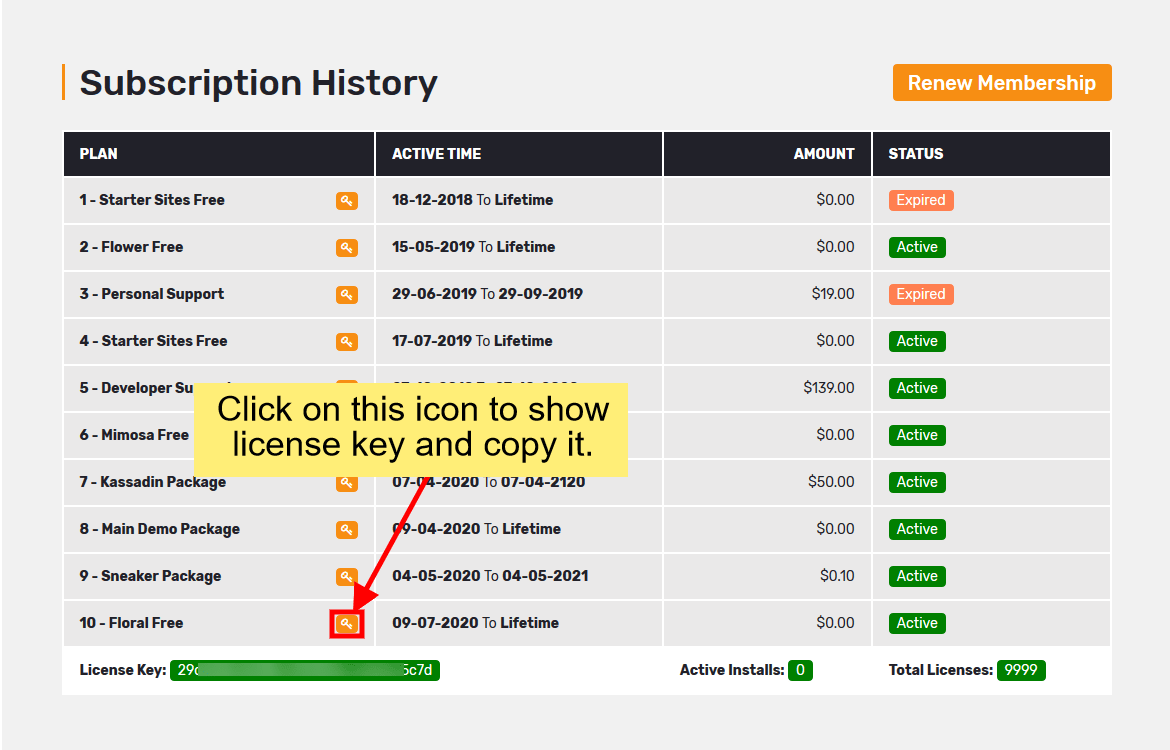
- Get license key from WooVina.com:
Visit WooVina.com and go to the My Dashboard > Subscriptions and copy license key:
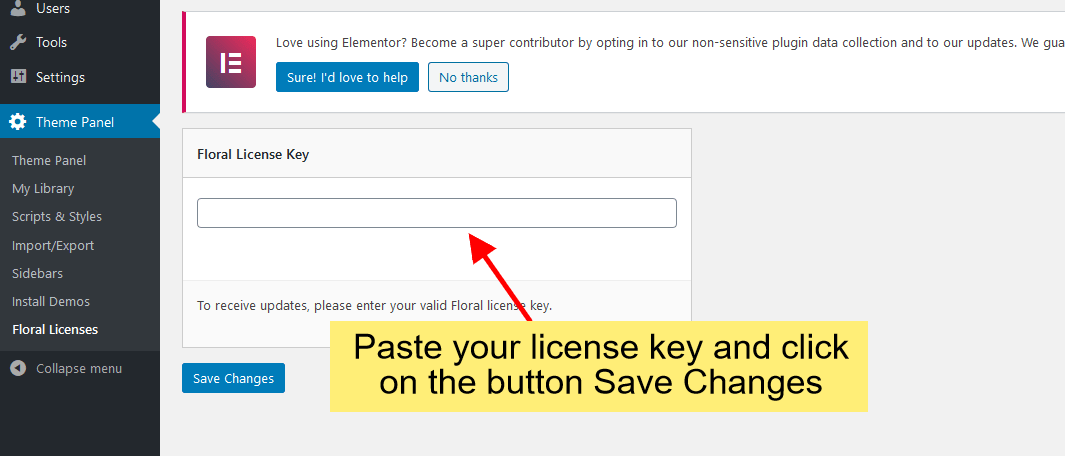
- Activate license on your website:
Login to your website, and go to the Theme Panel > Theme Licenses. Paste your license key and click on the button Save Changes
IV. Import a demo of the child theme
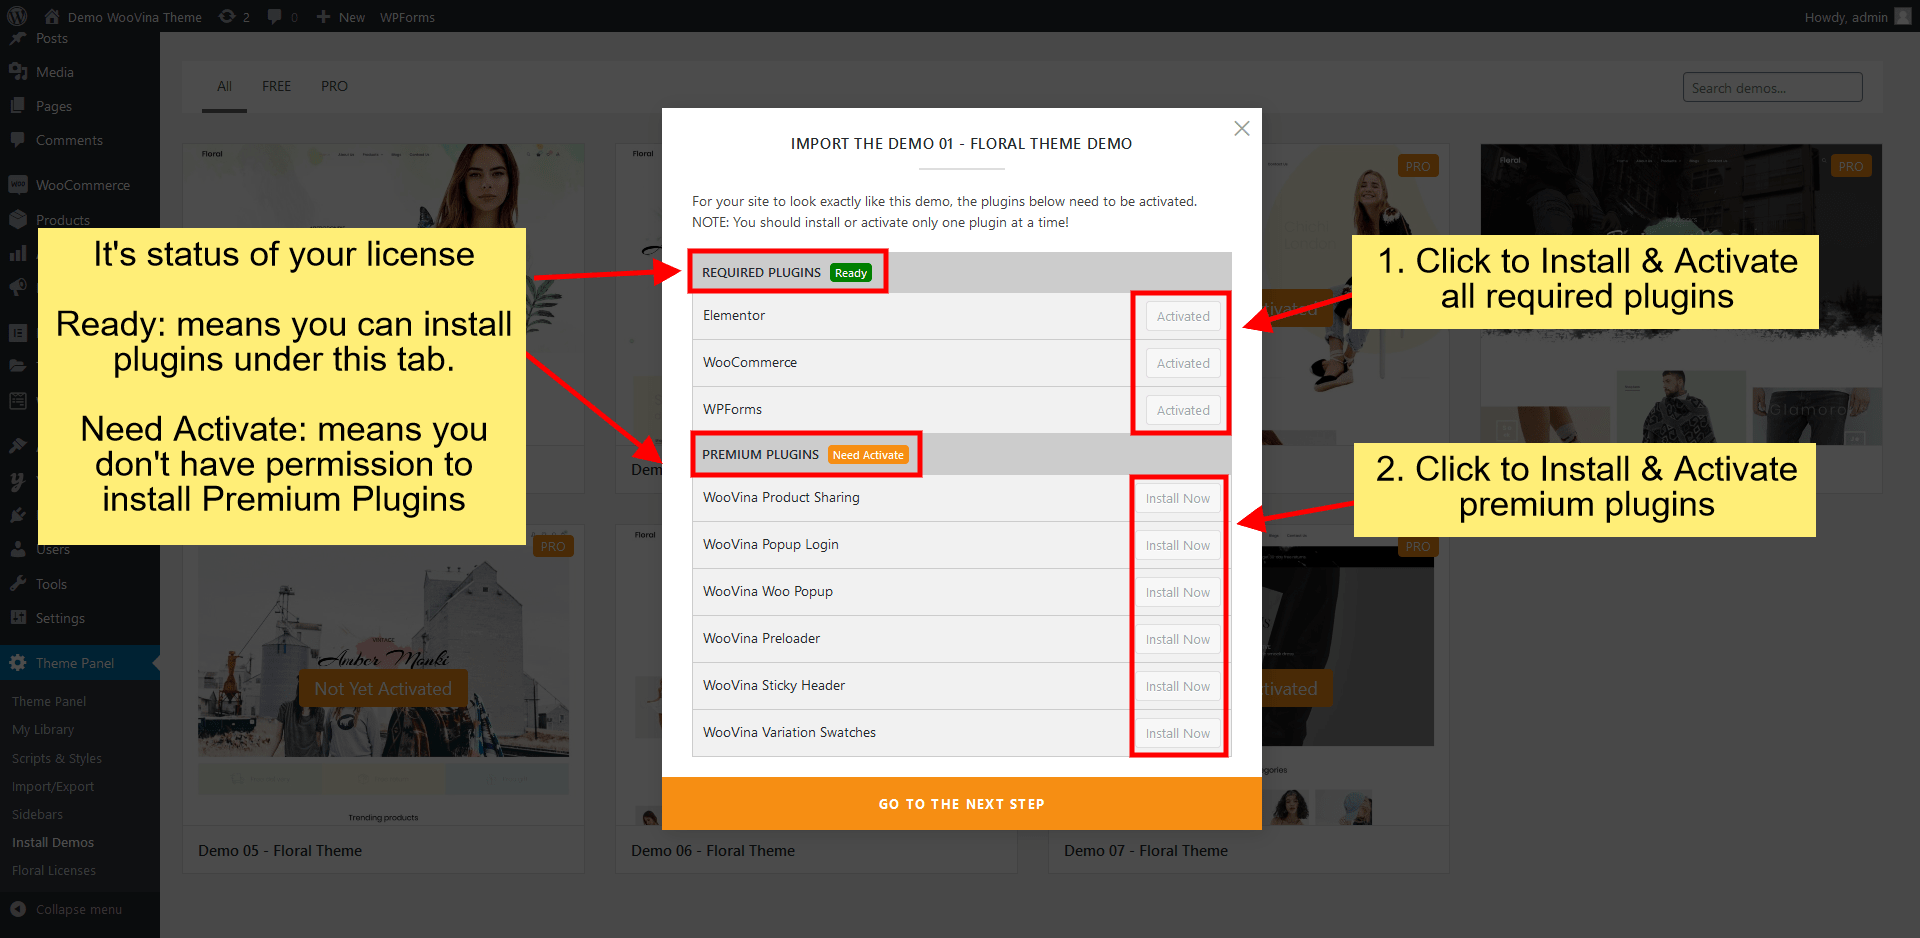
- Install & activate required plugins and premium plugins:
Login to your website, and go to the Theme Panel > Install Demos. Click on the demo screenshot and install & activate required plugins then click on Go to the next step
Premium Plugins help your website more attractive, more impressive features, but they are not required (not required to install and activate), you still can import demo without them.
NOTE: If your license has the right to install Premium Plugins, you can install/activate them by clicking the Install Now button.
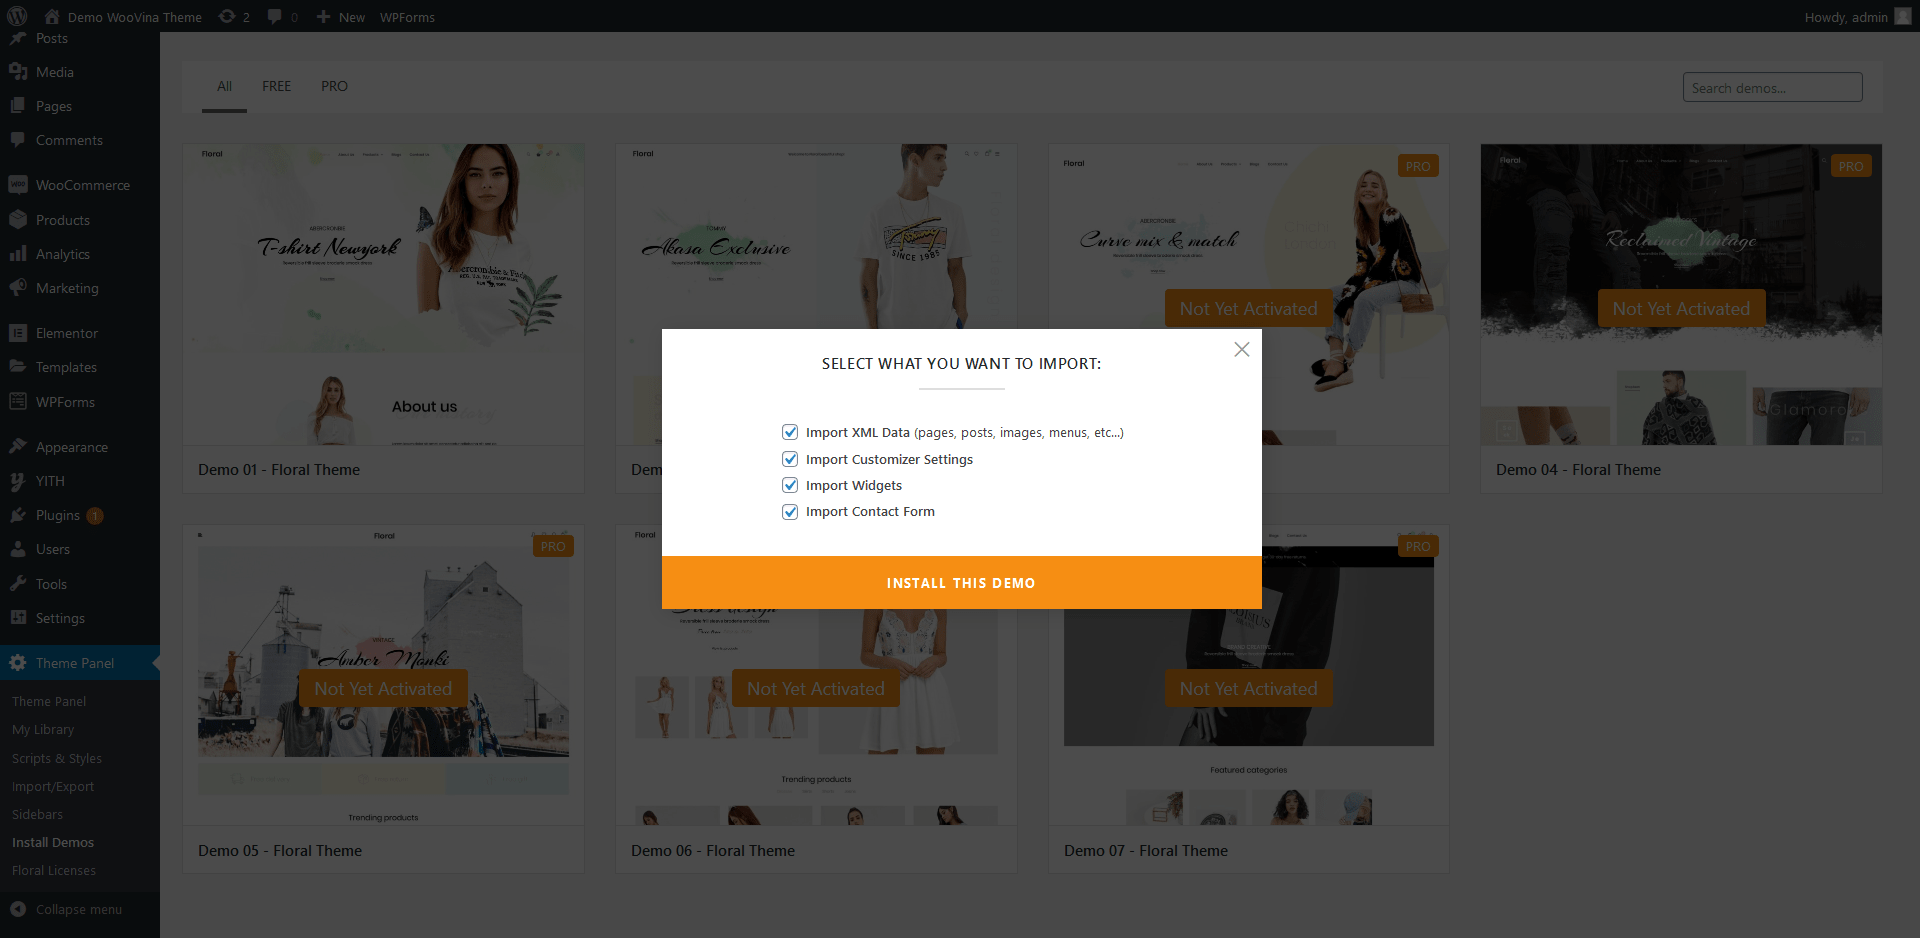
- Select what you want to import:
In this step, you can select what you want to import. You should select all them to make your website work exactly like live demo.
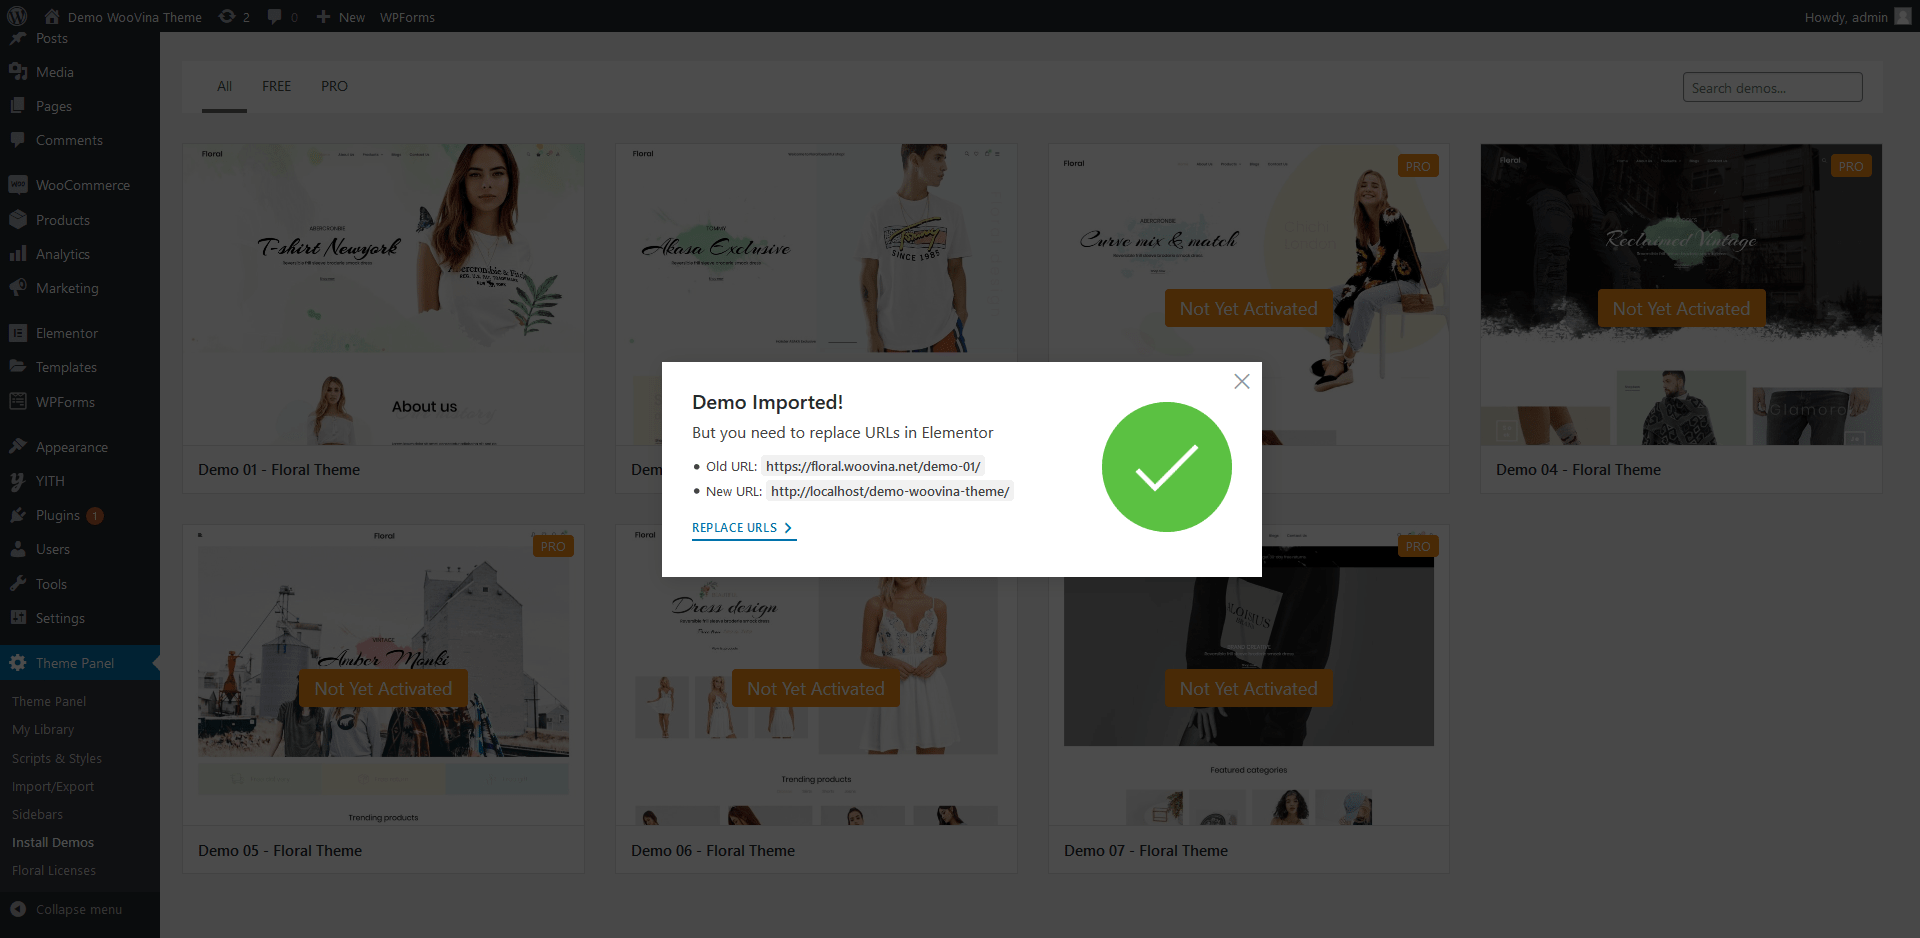
- Demo Imported & Replace URLs in Elementor:
After import successful, you need replace URLs in Elementor. You follow this article to know more details.
- Congratulations! Now you can do custom work and make the changes with your website.
In some cases, you will get an error that you cannot import a demo. Don't worry, your server configuration may not be right yet. Please check the following requirements and try importing again.
V. Recommended PHP Configuration Limits
Many issues that you may run into such as: white screen, your demo import fails, empty page content with Elementor and other similar issues are all related to low PHP configuration limits. The solution is to increase the PHP limits. You can do this on your own, or contact your web host and ask them to increase those limits to a minimum as follows:
-
max_execution_time 6000
-
max_input_time 6000
-
max_input_vars 5000
-
memory_limit 256M
-
post_max_size 32M
-
upload_max_filesize 32M
If you see any problem when import demo, please submit a ticket here to get support.