Table of Contents
Requirements
We recommend your host supports:
- WordPress v5.8 or higher (fresh installation)
- PHP version 7.4 or higher.
- MySQL version 5.6 or greater OR MariaDB version 10.1 or higher.
- Nginx or Apache with mod_rewrite module
And recommended PHP configuration limits:
- max_execution_time 6000
- max_input_time 6000
- max_input_vars 5000
- memory_limit 256M
- post_max_size 32M
- upload_max_filesize 32M
Install and import sample data
Install WooVina theme & required plugins
Download WooVina package from the homepage

Extract/Unzip the downloaded package
- Extract the file: woovina_unzip_first.zip
- You will get two new files: woovina.zip and Readme.txt
- Please don't forget to read the file: Readme.txt

Install & Activate WooVina Theme
- Login to the backend of your website, go to Appearance > Themes > Add New > Upload Theme.
- Browse the file: woovina.zip and click Install Now.
- Click on the link Activate on the next screen to activate the WooVina theme.

Install Required & Recommended Plugins
- Click on the link "Begin installing plugins" on the next screen: https://nimb.ws/Wj32Hh
- Select all plugins to install and click the Apply button: https://nimb.ws/H04dEZ

Delete default pages
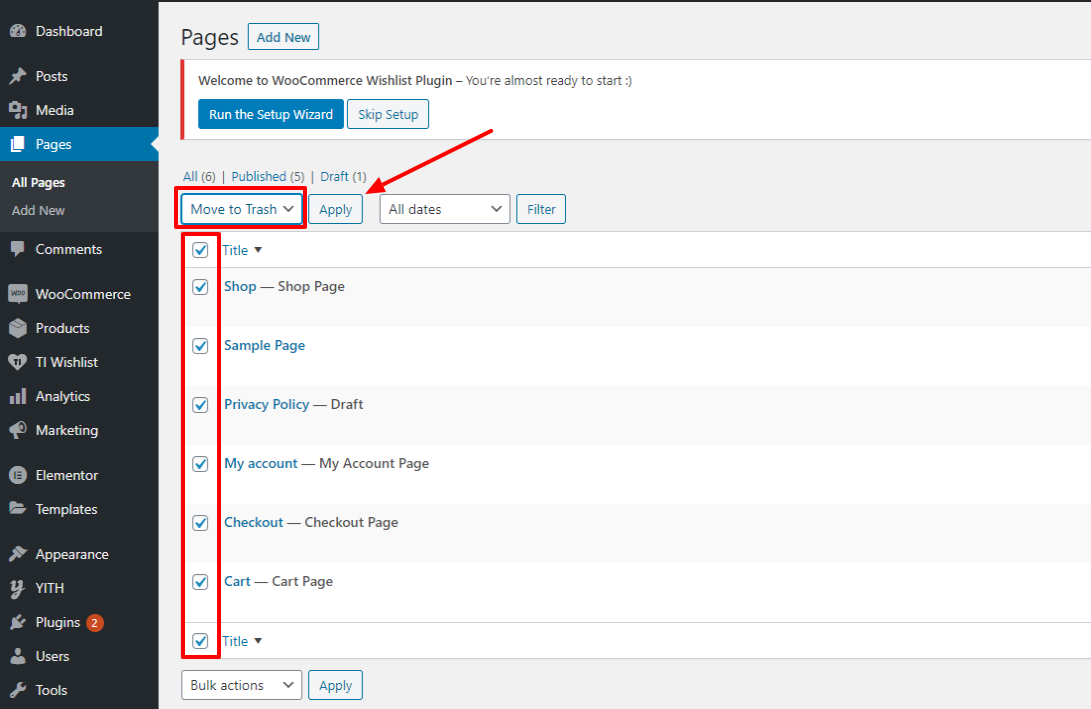
After installing the WooVina theme and the required plugins, you need to delete the pages automatically generated by the plugins before importing the sample data.
Move all pages to trash
From your website dashboard, go to Pages, select all pages and click on the button Apply to move all pages to trash.
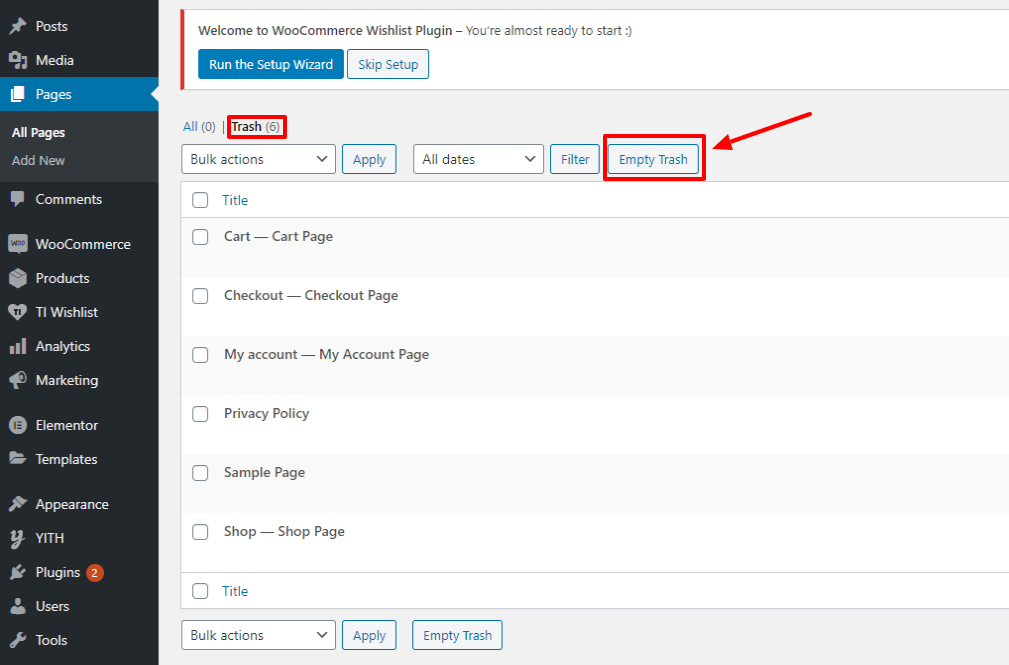
Empty trash
After moving all pages to trash, click on the link Trash and click on the button Empty Trash.
Install Bookima Theme
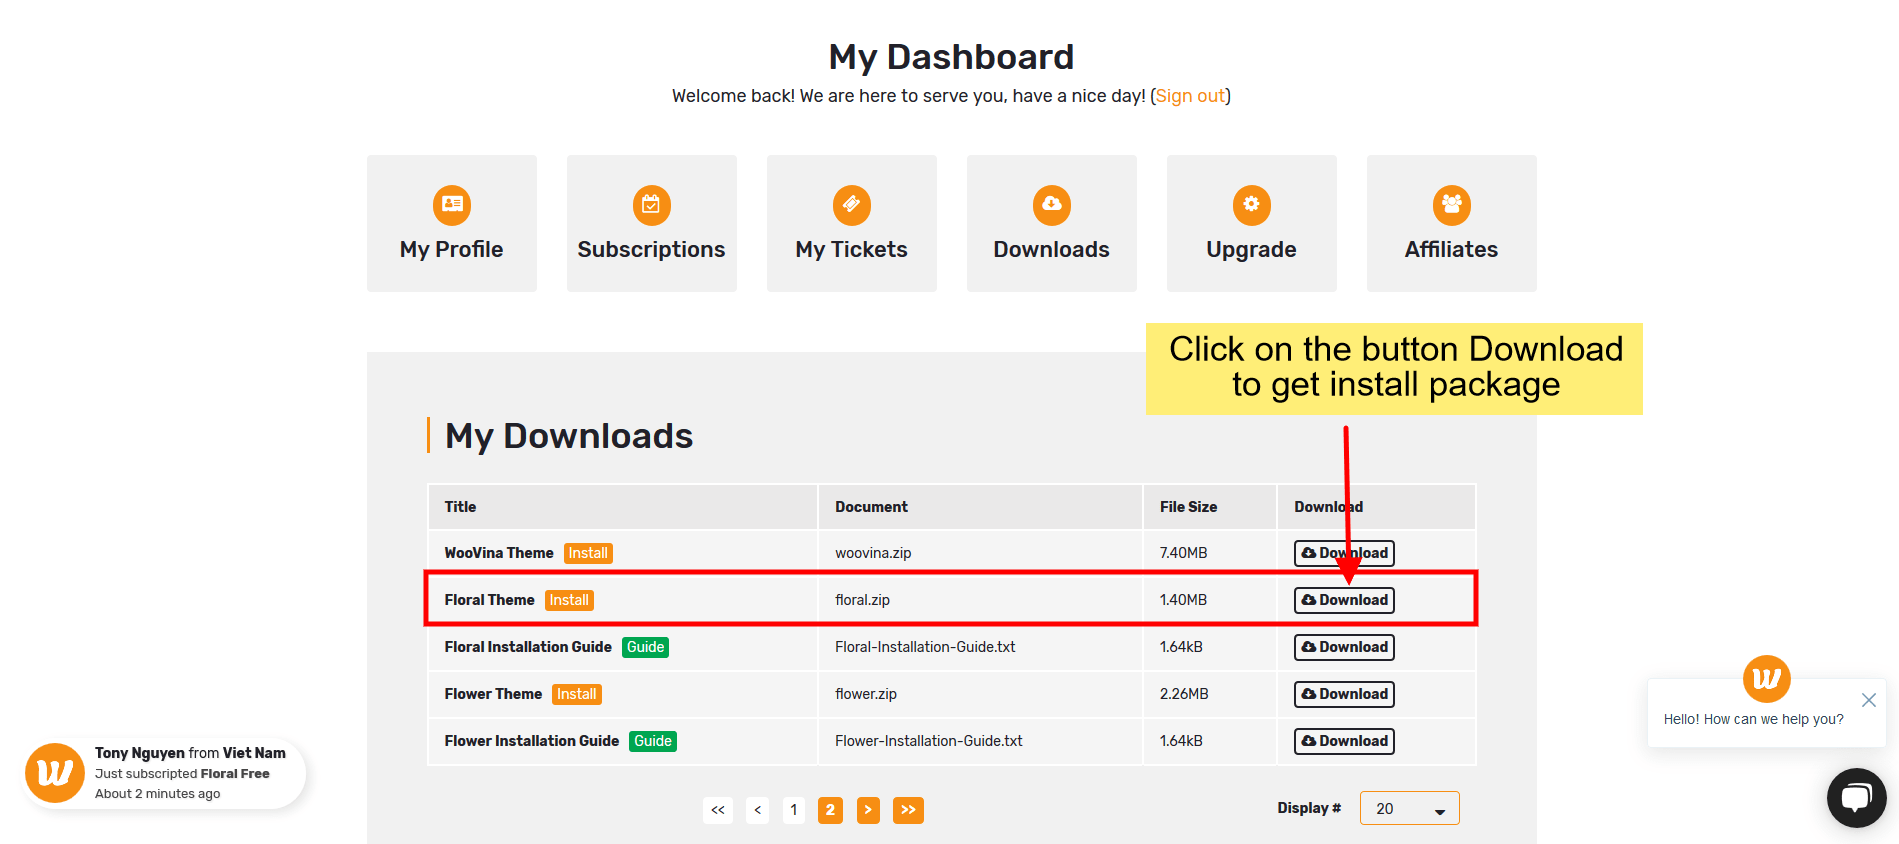
Download child theme install package
After registering a child theme's package, you need to login to WooVina.com and go to the My Dashboard > Downloads and download child theme install package:
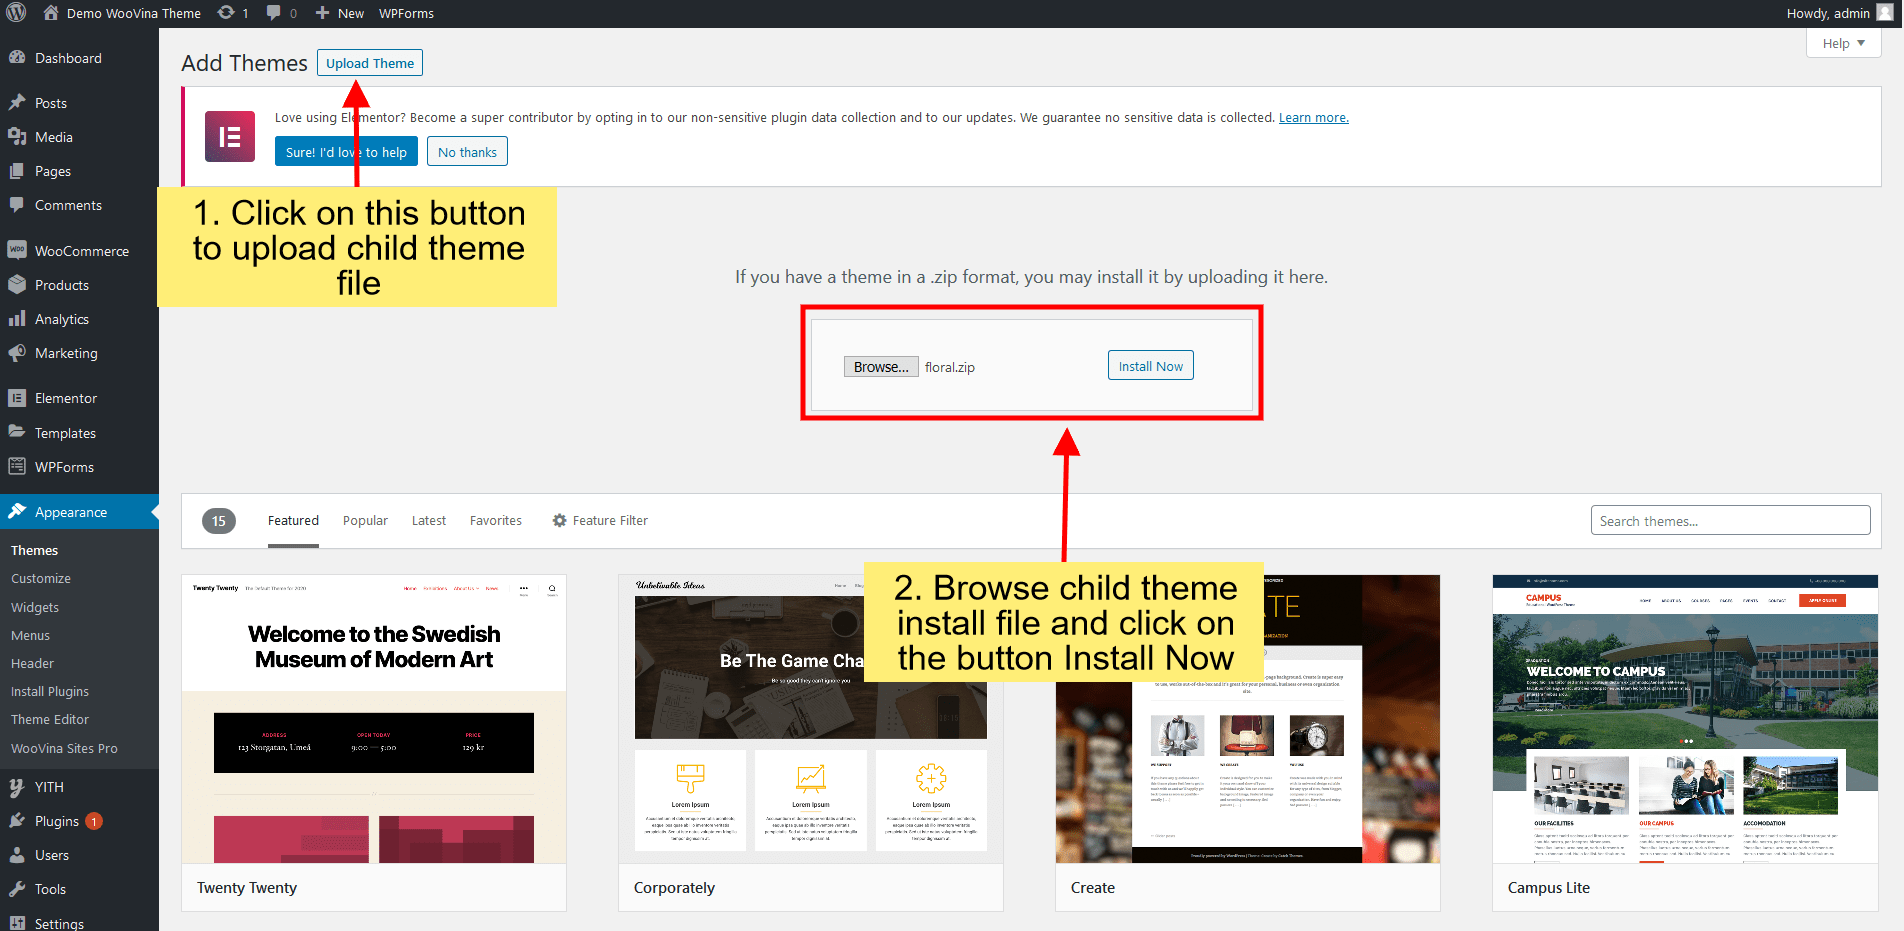
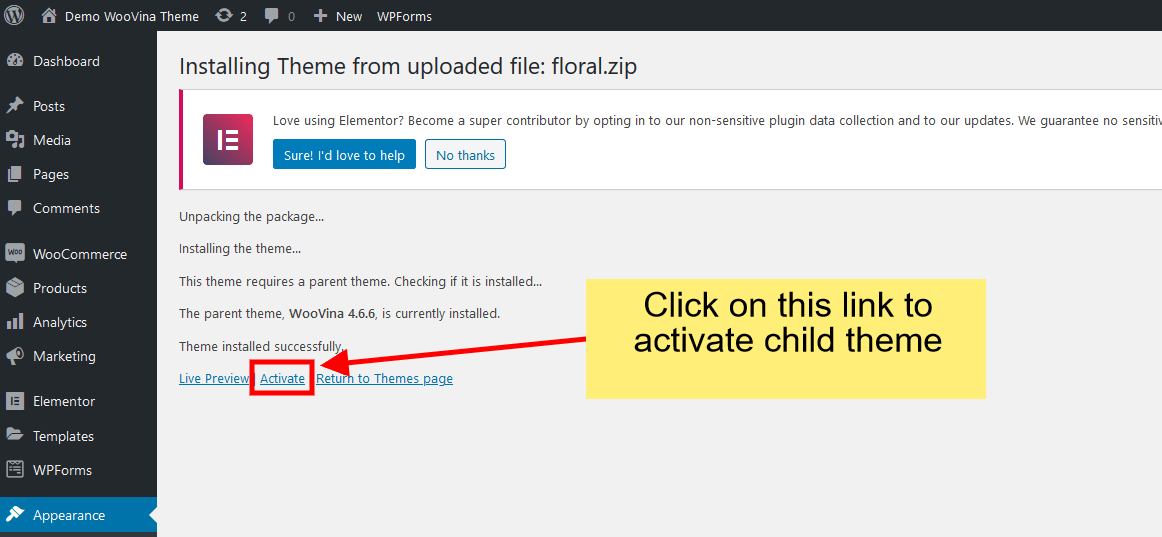
Install and activate child theme
Login to your website, and go to the Appearance > Themes > Add Themes > Upload Theme > Browse... child theme install file you've downloaded > Click on the button Install Now
Activate license to install Premium Plugins
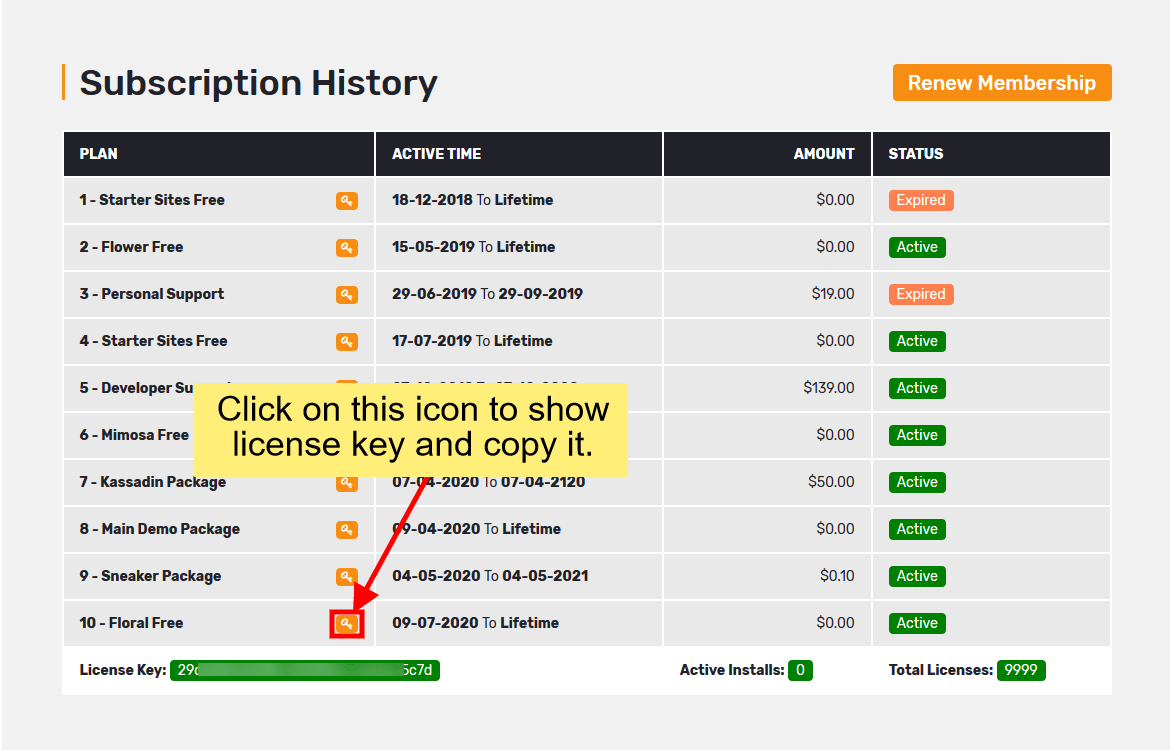
Get license key from WooVina.com
Visit WooVina.com and go to the My Dashboard > Subscriptions and copy the license key of Bookima Theme.
Activate the license on your website
Login to your website, and go to the Theme Panel > Bookima Licenses. Paste your license key and click on the button Save Changes.

Import a demo of the child theme
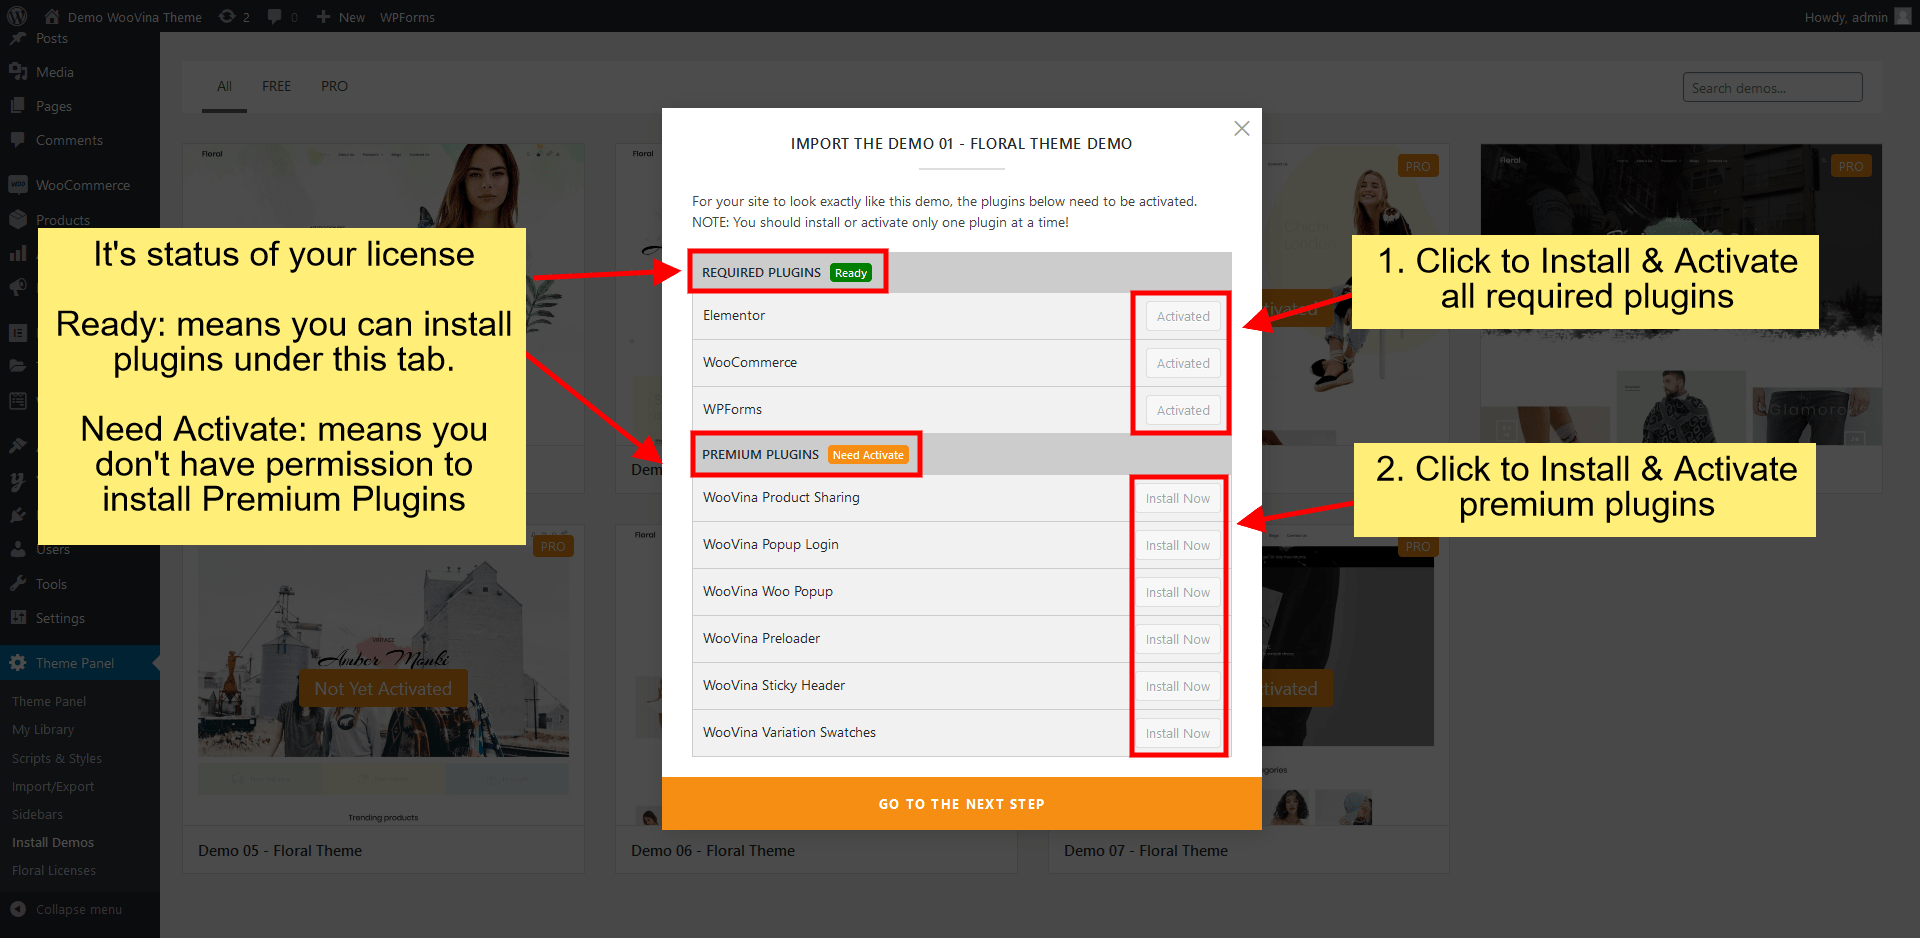
Install & activate required plugins and premium plugins
Login to your website, and go to the Theme Panel > Install Demos. Click on the demo screenshot and install & activate the required plugins then click on Go to the next step.
Premium Plugins help your website more attractive, more impressive features, but they are not required (not required to install and activate), you still can import demo without them.
NOTE: If your license has the right to install Premium Plugins, you can install/activate them by clicking the Install Now button.
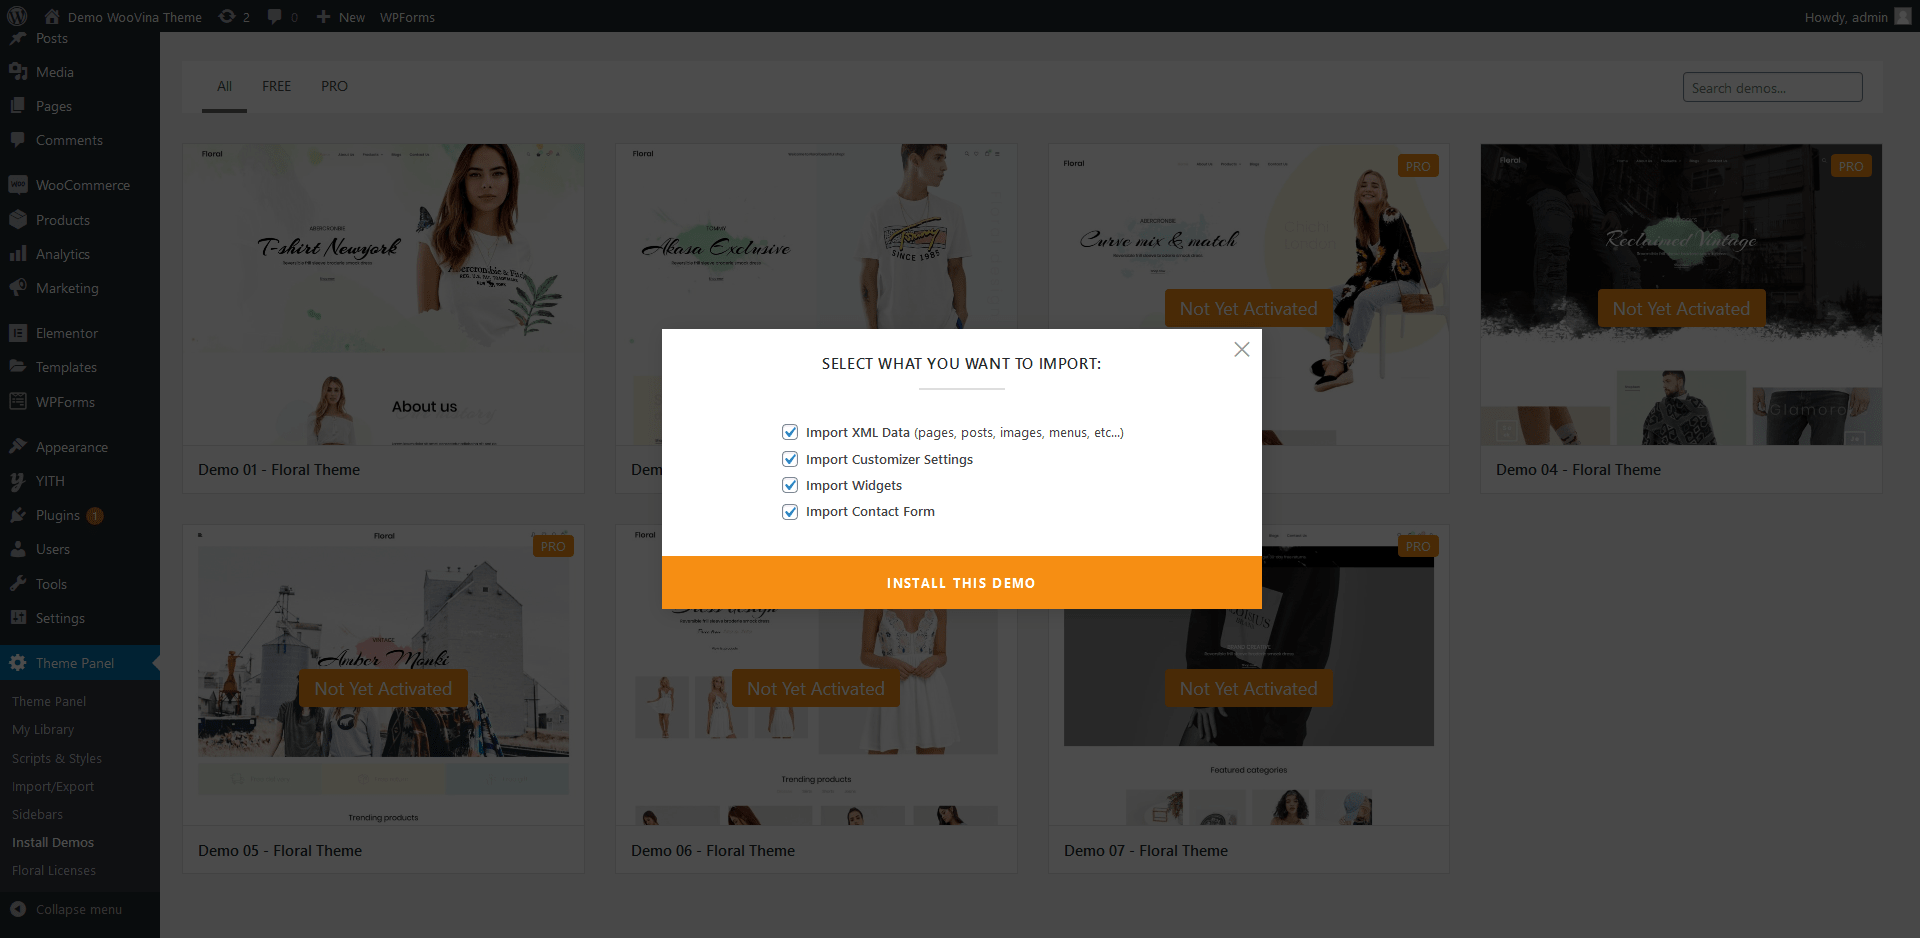
Select what you want to import
In this step, you can select what you want to import. You should select all of them to make your website work exactly like the live demo.
Replace URL
After the import is successful, you need to replace URLs in Elementor. Click the button REPLACE URLs and replace the demo URL with your website URL.
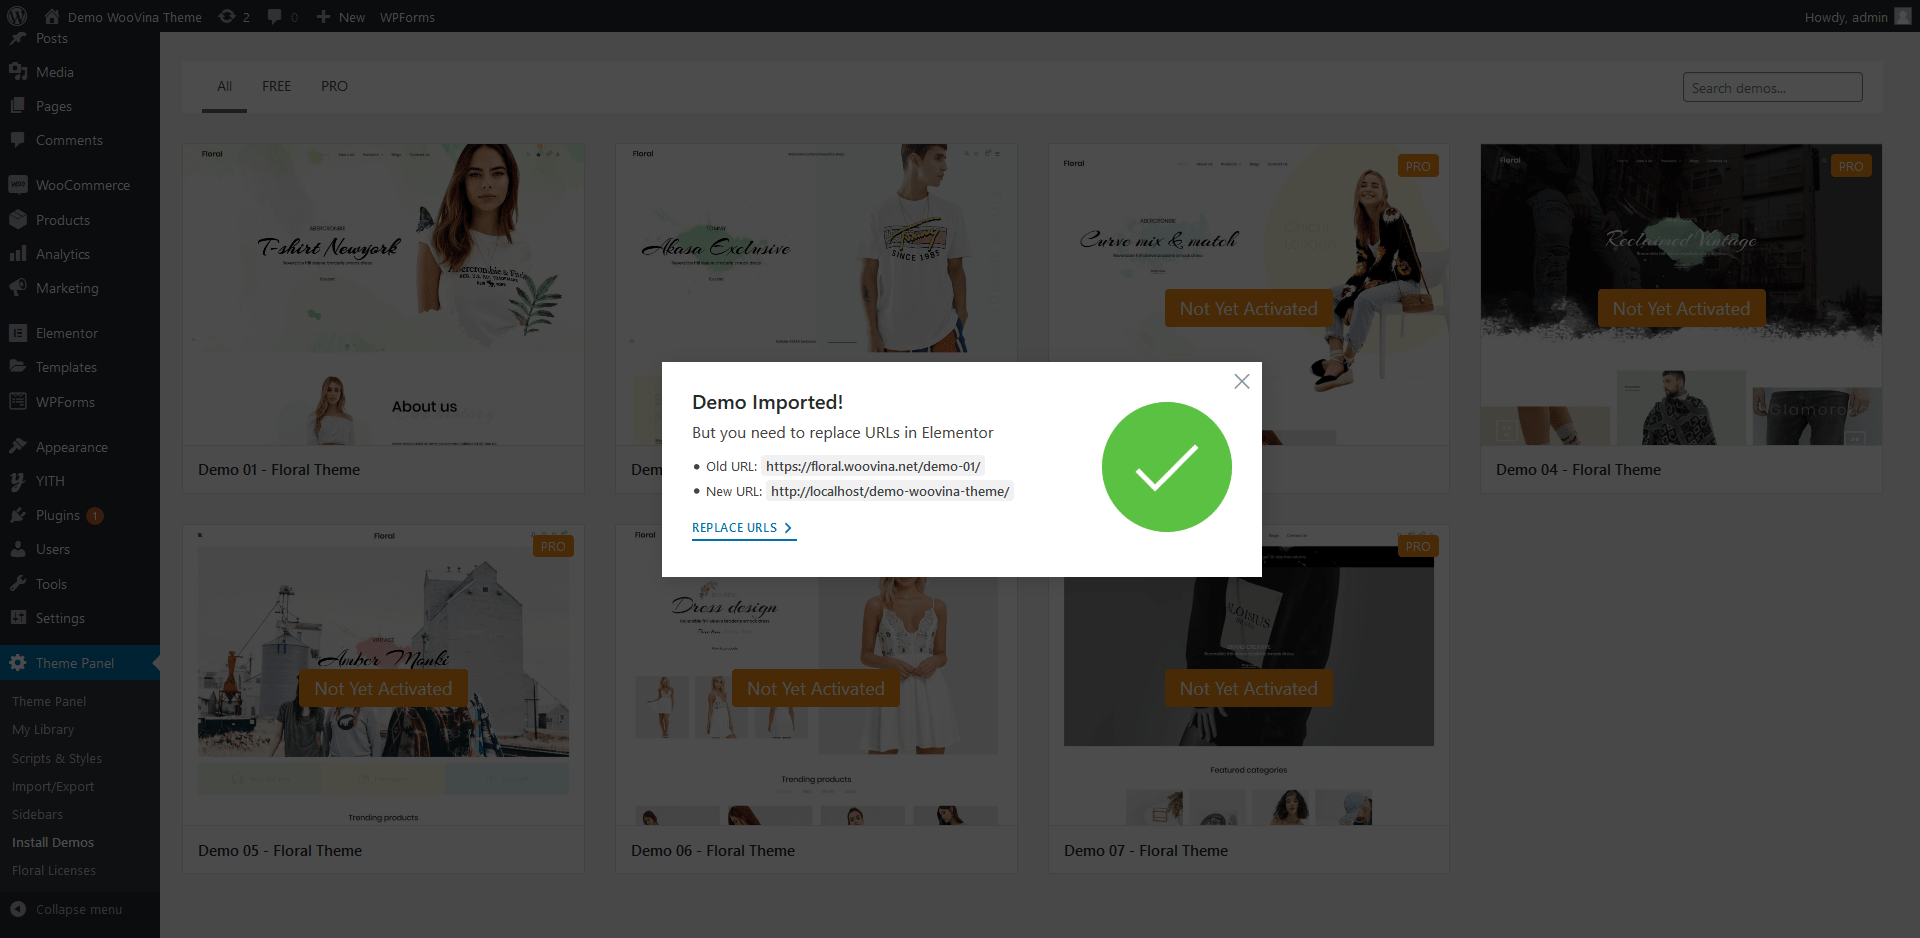
Congratulations! Now you can do custom work and make changes to your website.
Customization
Change logo, favicon
Change logo
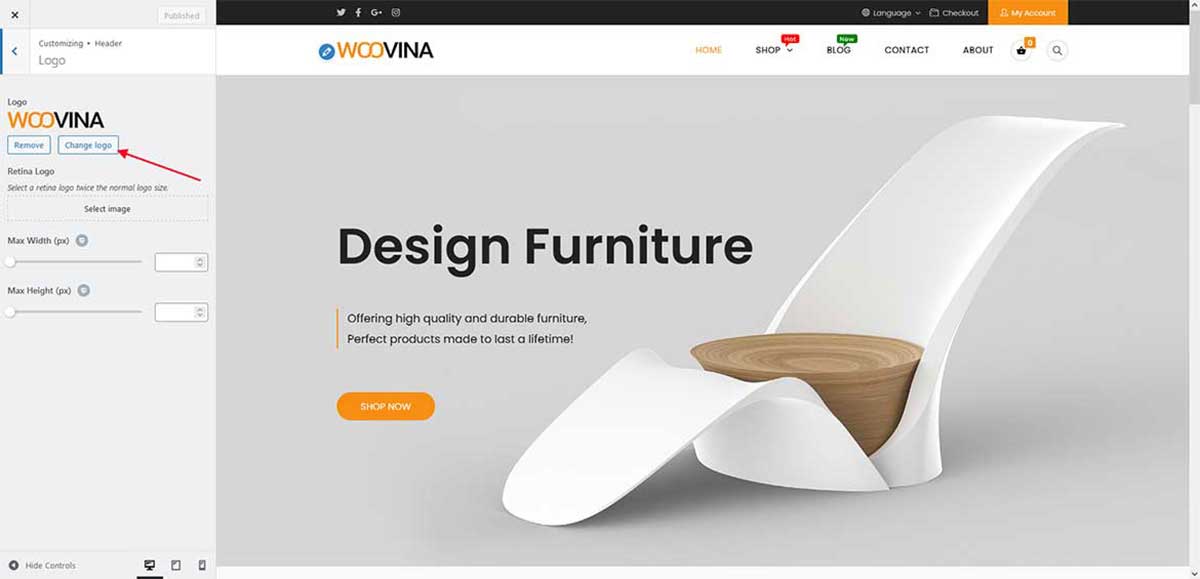
Login to your website, and go to the Appearance > Customize > Header > Logo. Click on the button Change Logo and choose your logo.
Change favicon
Login to your website, and go to the Appearance > Customize > Site Identity. Click on the button Change image and choose your favicon.
![]()
Edit Custom Header
 Header
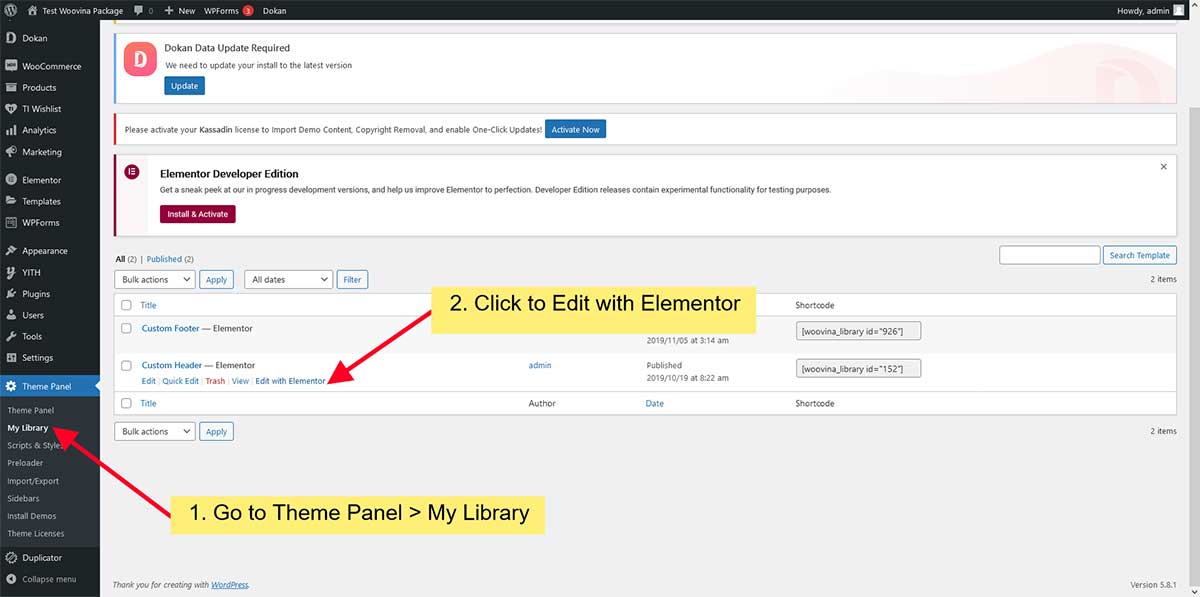
Login to your website, and go to the Theme Panel > My Library. Hover to Custom Header and click to Edit with Elementor
Edit Custom Footer
 Footer
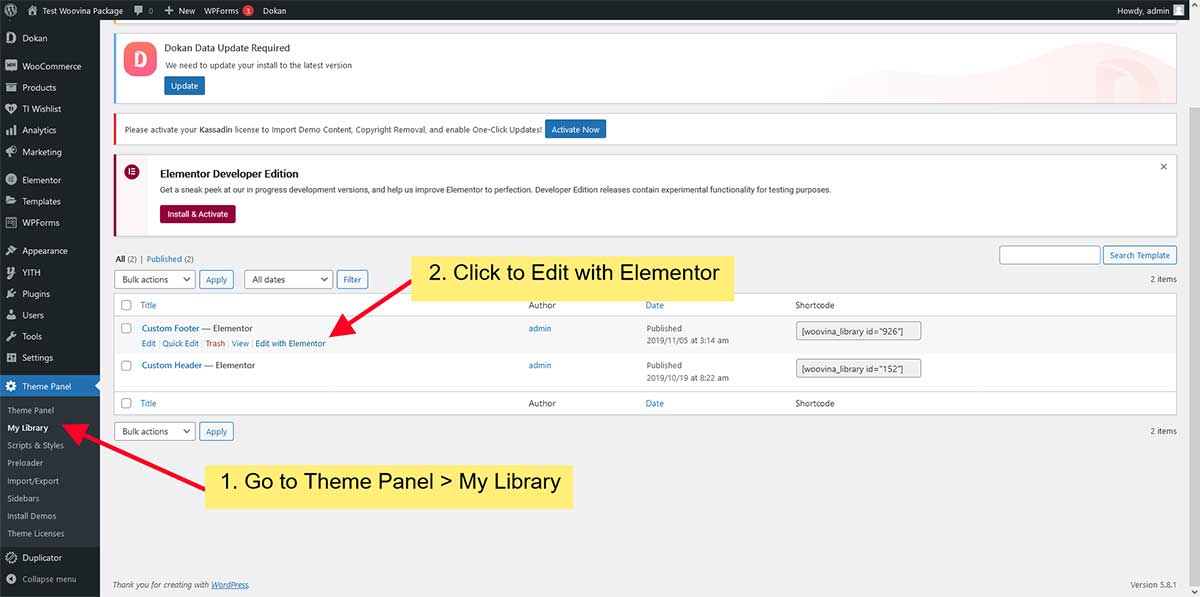
Similar to Header, you need to go to Theme Panel > My Library. Hover to Custom Footer and click to Edit with Elementor
Edit Homepage layout
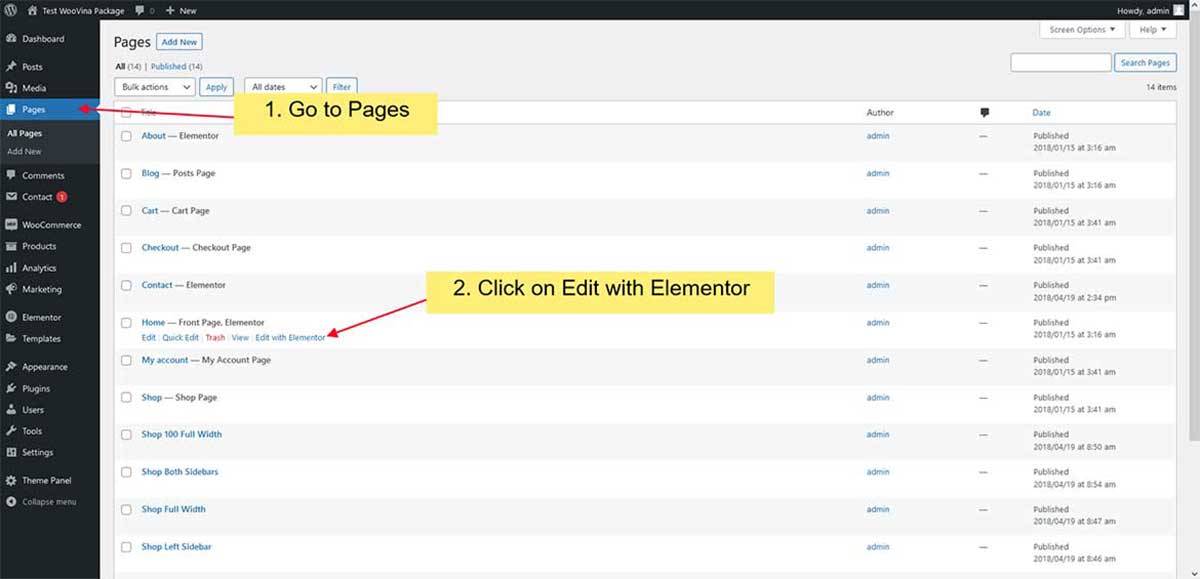
Login to your website, and go to the Pages. Hover to Home and click to Edit with Elementor
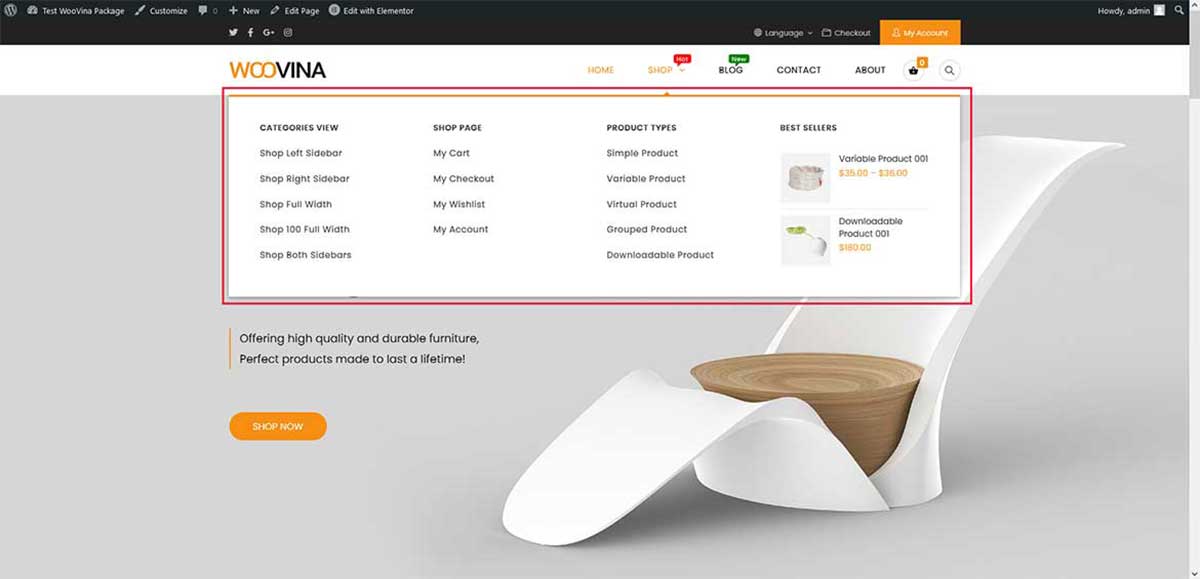
Edit Megamenu
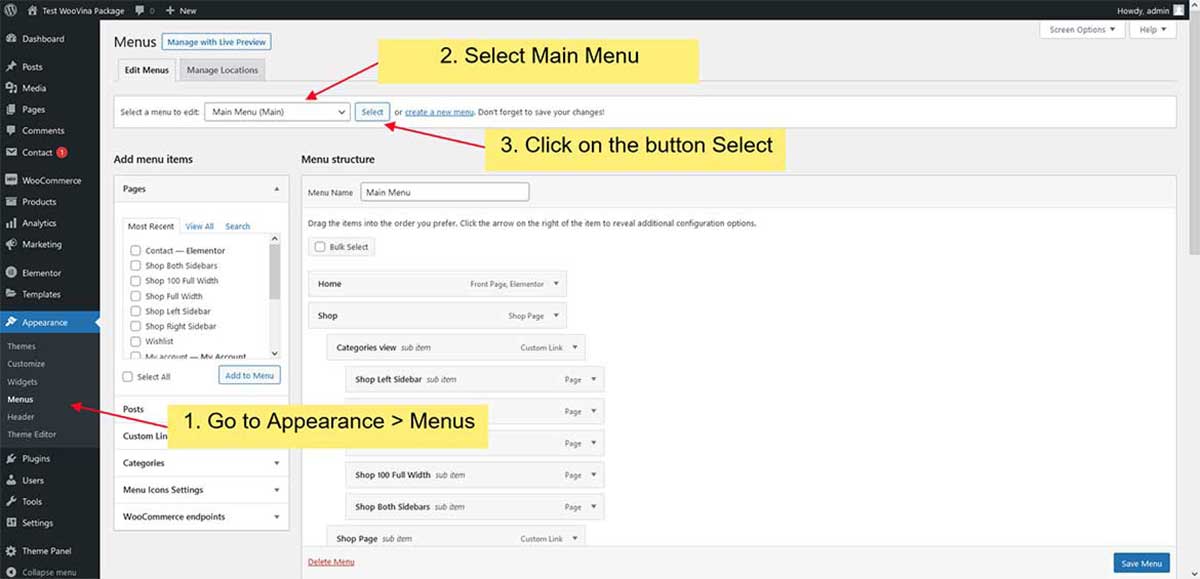
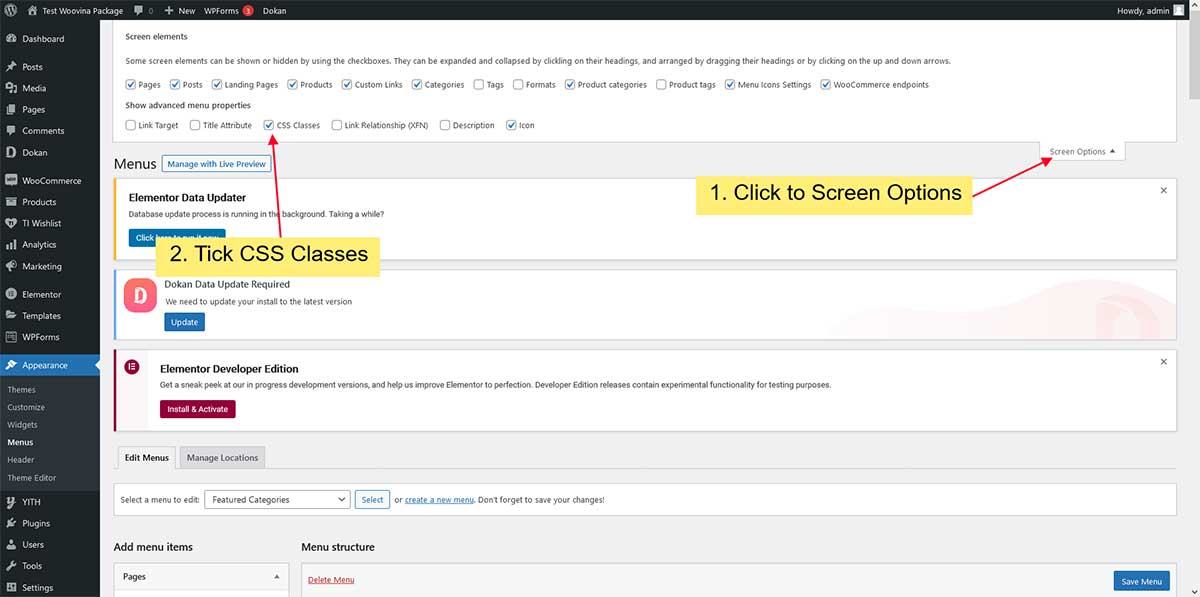
Login to your website, and go to the Appearance > Menus and select menu Featured Categories and click to button Select
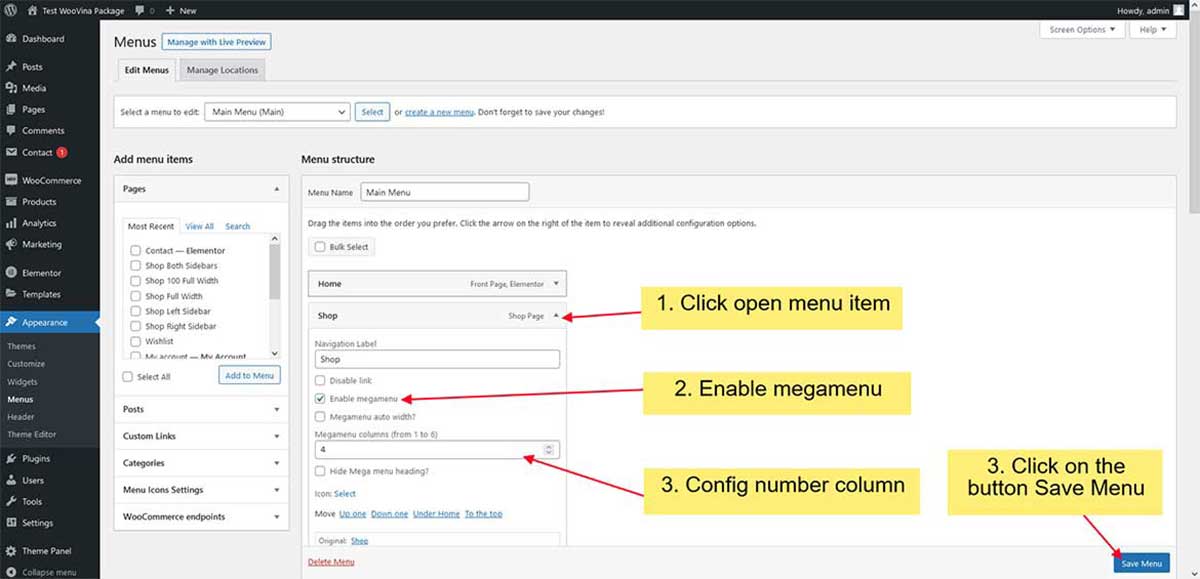
NOTE: If you don't see a section to add a class to a menu item, scroll to the top of the page and click on Screen Options, then tick CSS Classes.
Setup TI WooCommerce Wishlist plugin
If you want to use the Product Wishlist feature, you need to install the TI WooCommerce Wishlist plugin and change the configuration values as shown in the following image:

Setup YITH WooCommerce Compare plugin
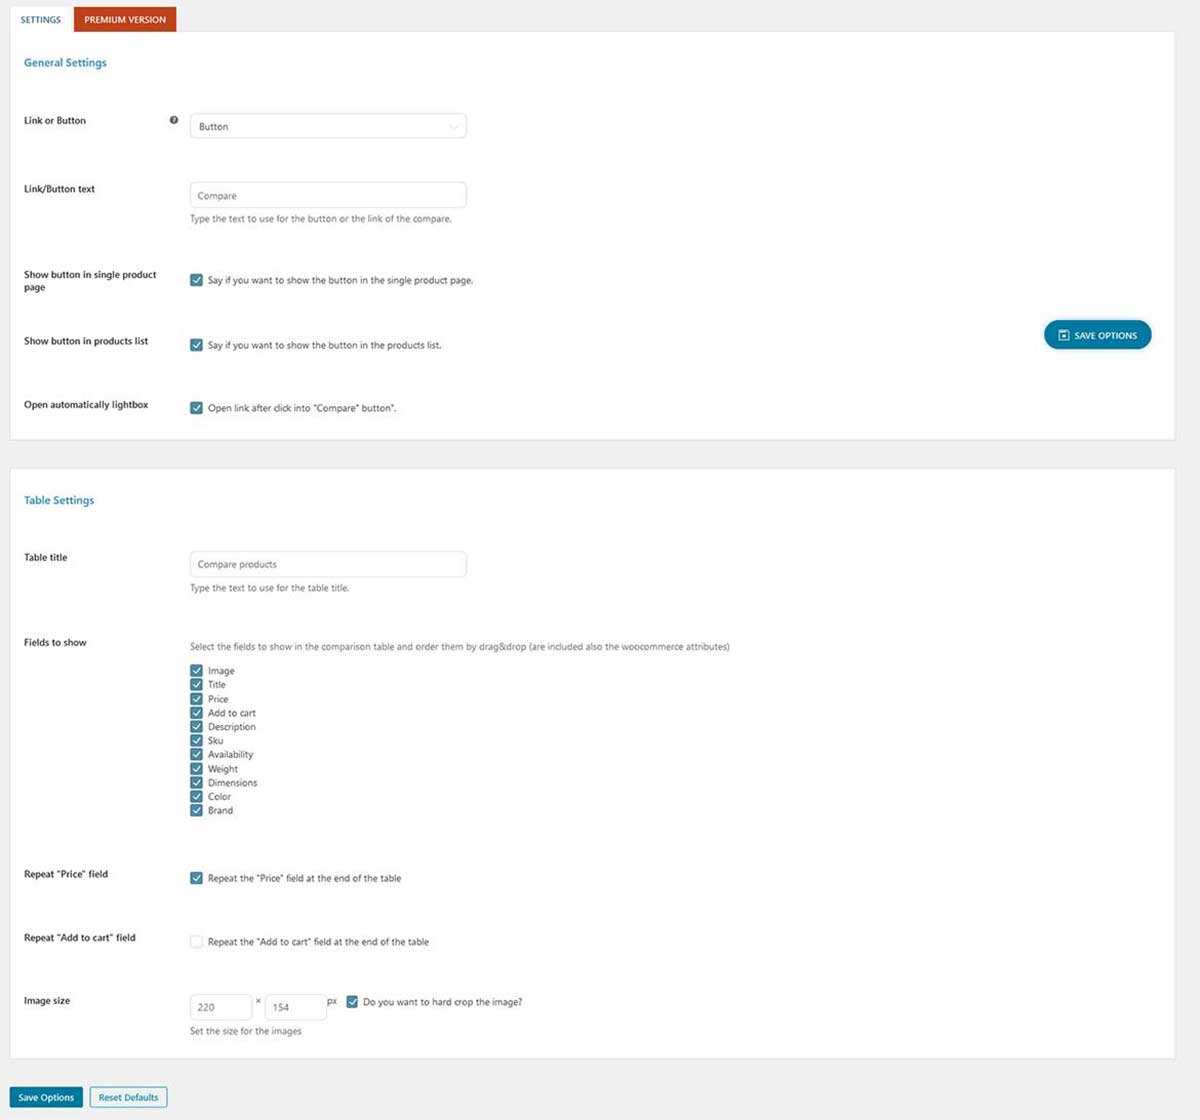
If you want to use the Product Compare feature, you need to install the YITH WooCommerce Compare plugin and change the configuration values as shown in the following image:
Add Custom CSS and JS
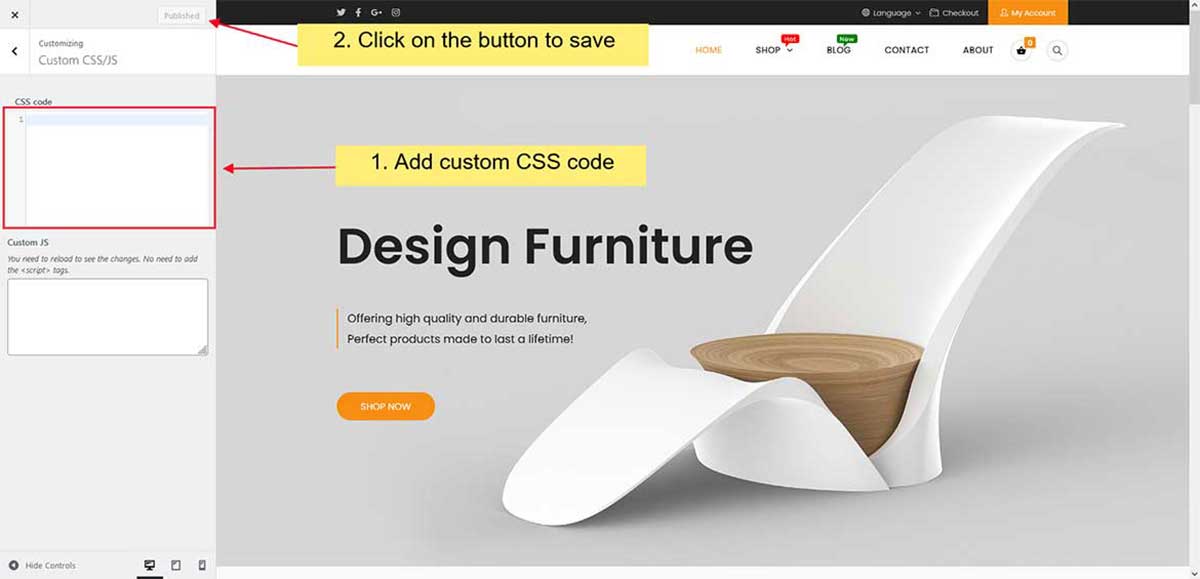
You can add your custom CSS codes (snippets) easily via the Customizer.
Add Custom CSS: go to Appearance > Customize > Custom CSS/JS and enter your code into the Custom CSS text area.
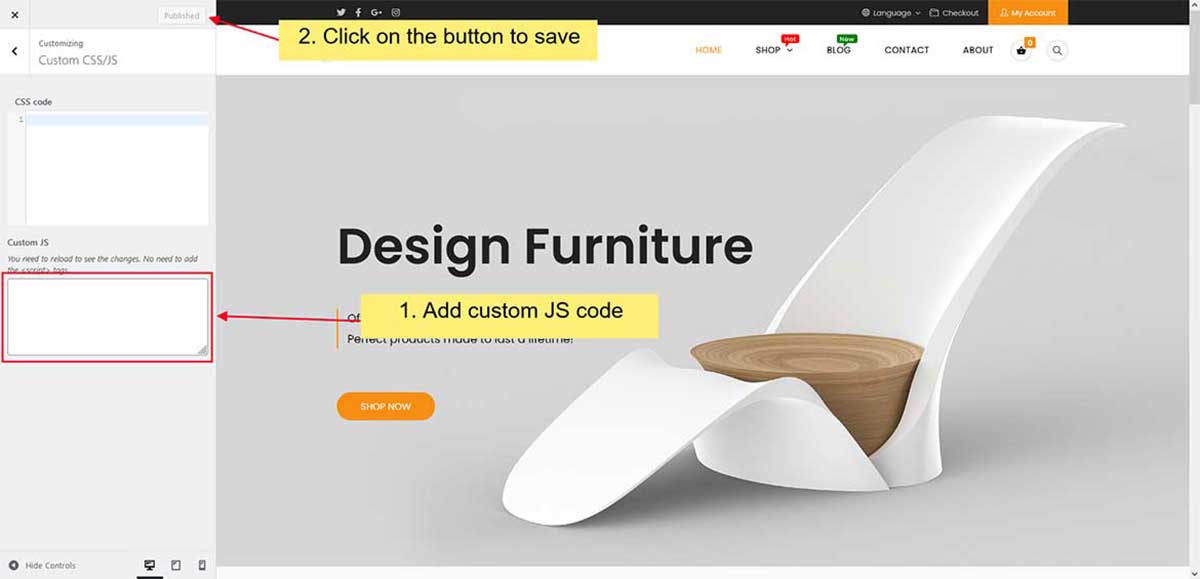
Add Custom JS: go to Appearance > Customizer > Custom CSS/JS and enter your code into the Custom JS text area (Note: There is no need to include JavaScript tags.)
Please note that is not possible to add Google Analytics codes in this area because they have changed their methods. If you wish to use Google Analytics on your website, please install a plugin that supports GA.
Useful links
- How to manage WooCommerce products? https://docs.woocommerce.com
- How to optimize website loading speed? https://woovina.com/blog/news-update/6-steps-to-wordpress-speed-optimization-with-free-or-paid-plugins
- How to use Elementor? https://elementor.com/help/how-to-use-elementor
- How to use WooVina Premium Extensions? https://woovina.com/docs/extensions
If you see any problem when importing & customizing the demo, please submit a ticket here to get support.

